

Scavenger
-
Posts
1,385 -
Joined
-
Last visited
Content Type
Profiles
Forums
Events
Gallery
Store
Posts posted by Scavenger
-
-
Today, I...
1) Fixed my broken passenger door lock
2) Installed MINI projector puddle lights
-
 2
2
-
-
This afternoon, I replaced the gasket on the power steering fluid reservoir and tightened the hose clamps. I hate when they start leaking and get all messy.
-
I think there is a way to fix the visors, but I didn't want to spend a lot of time on it, I managed to destroy the first one taking it apart just to determine the problem. The sunroof drains definitely are important!
-
On 4/26/2021 at 7:04 AM, 1975_mini said:
Nice job
Thanks!
-
On 4/26/2021 at 7:05 AM, 1975_mini said:
Looking good
Thanks!
-
So, this year I've done a lot of work on B.A. to get him back in good condition. After 15 years and 130K miles, a MINI is going to need some work. I wanted to capture it all here. Maybe this information will be helpful to others. Particular first gen owners.
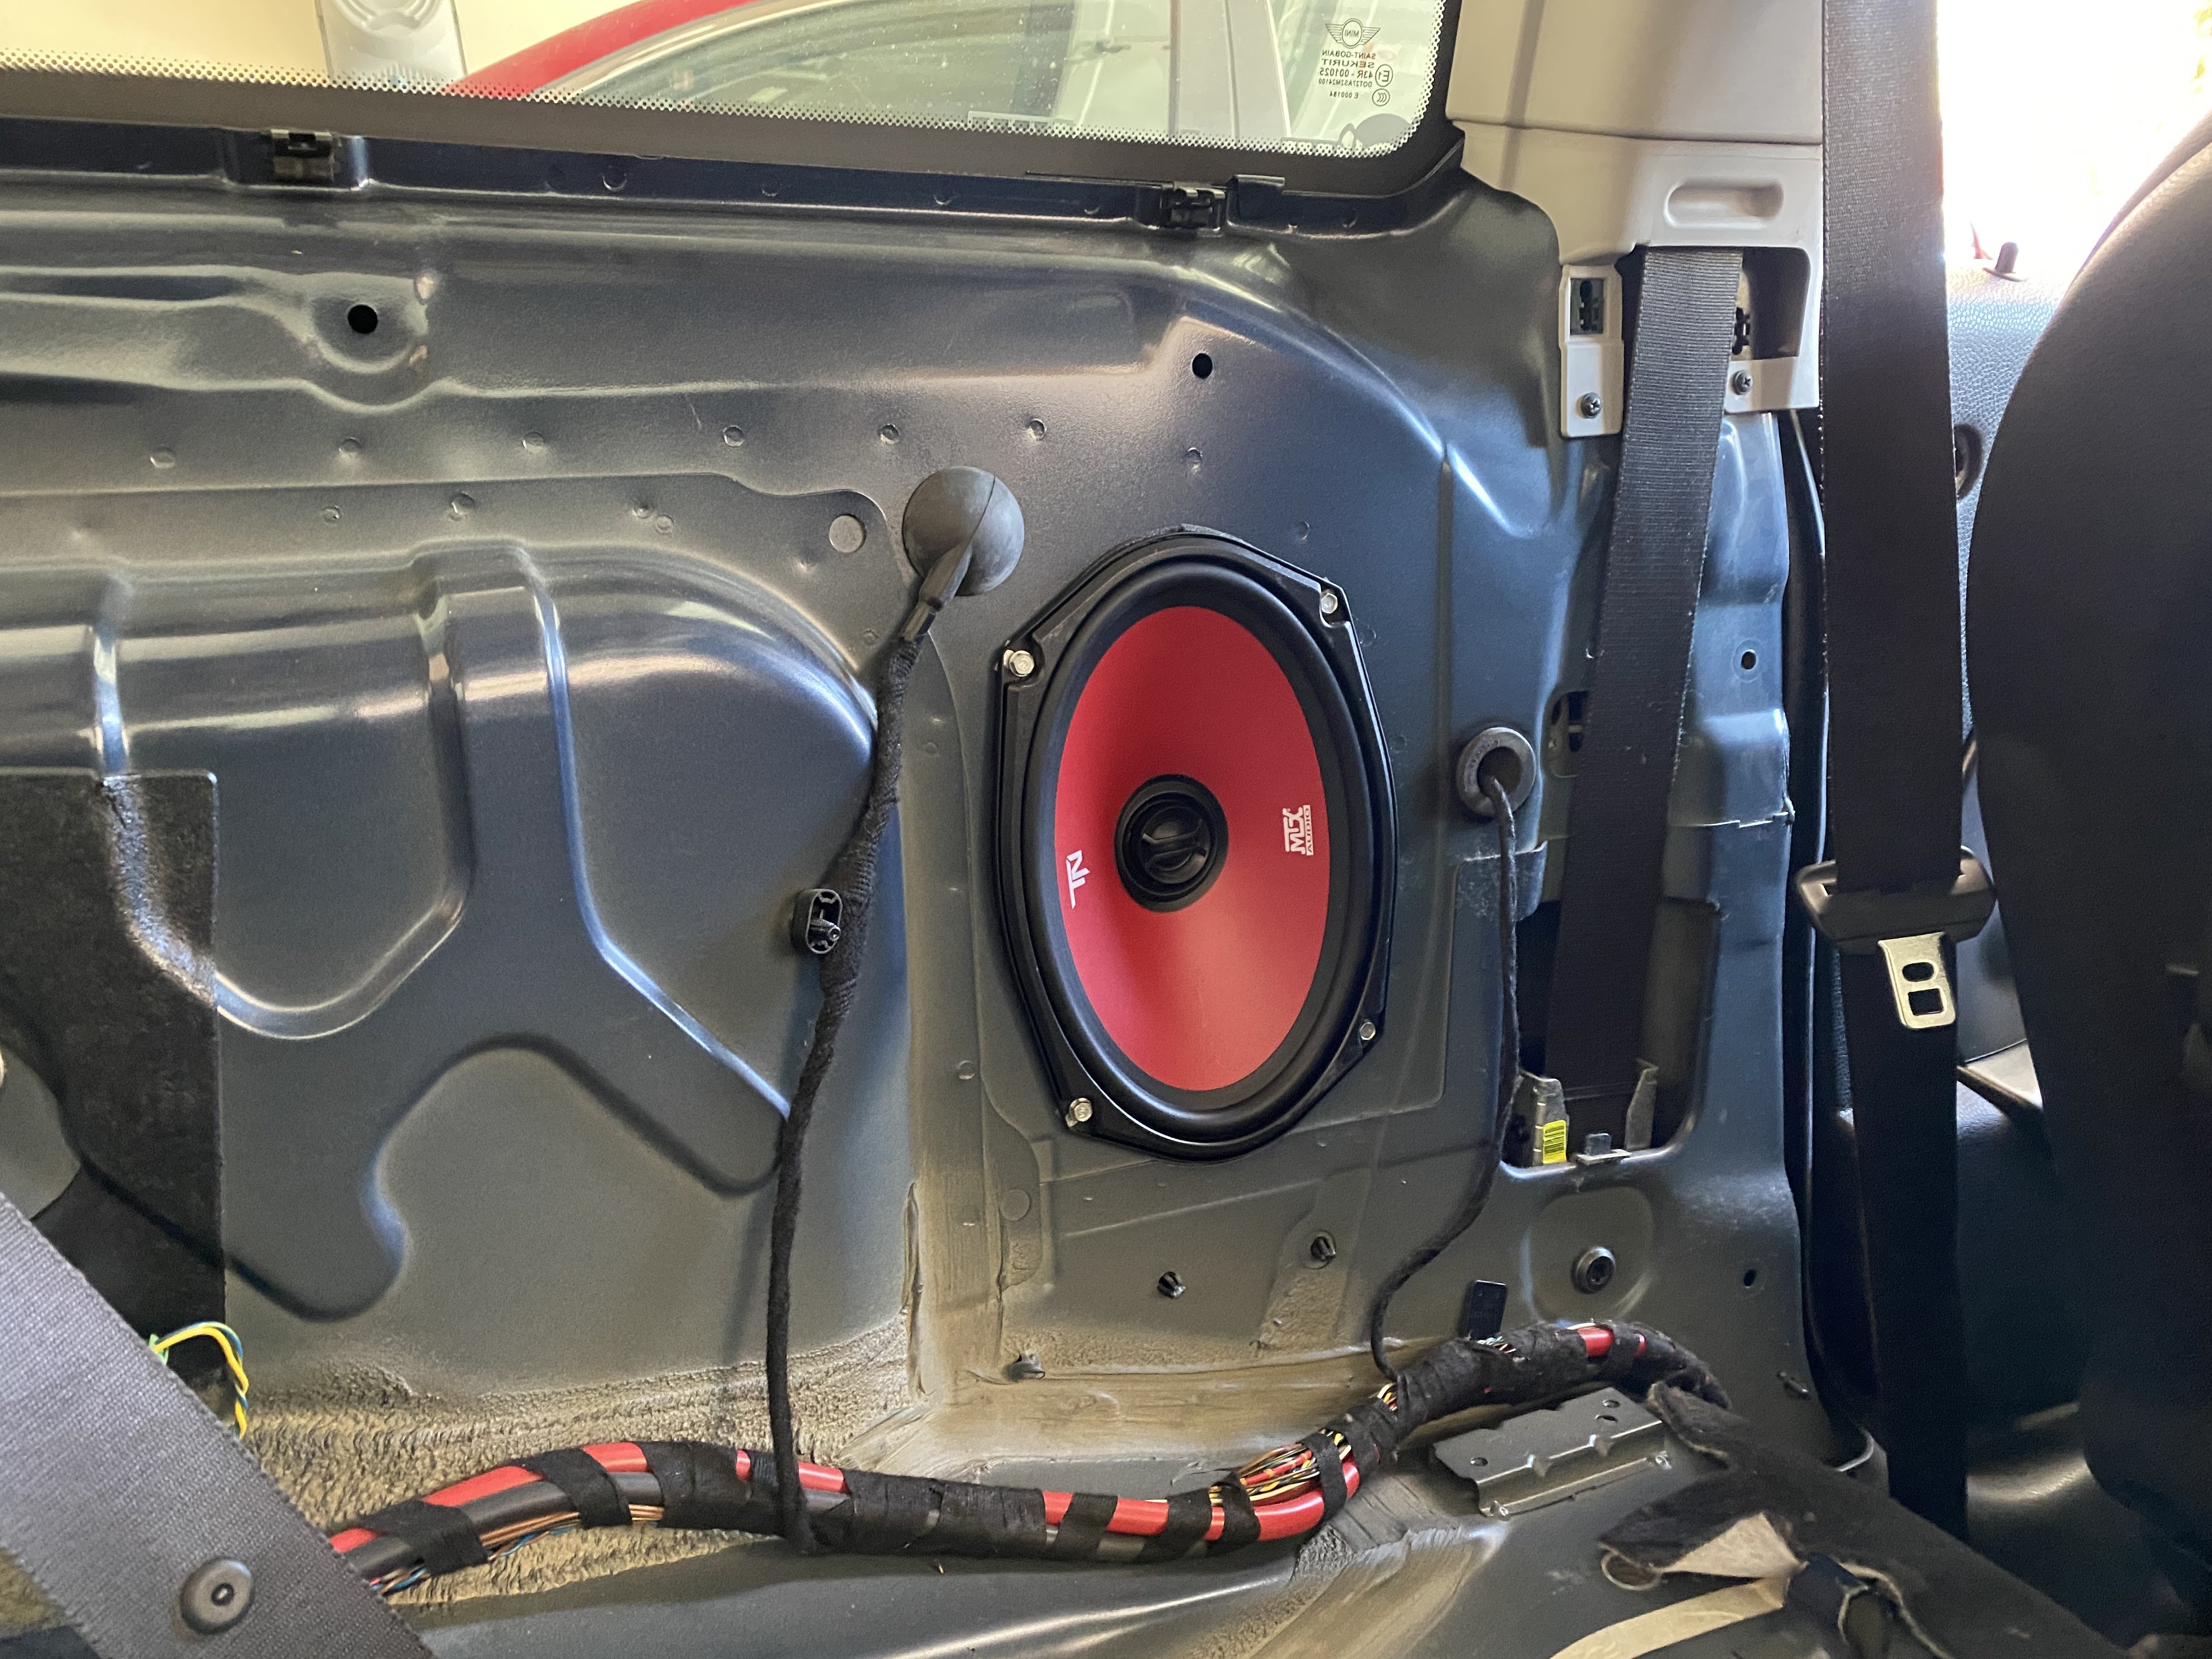
While I had the interior pulled out, I used this chance to replace the stock speakers. I had already upgraded the head unit a few years ago to a nice Kenwood Excelon, but I hadn't done the speakers. Important Note - I have the base stereo system, NOT the Harman-Kardon or DPSM, and also I don't have navigation, those options have different requirements.
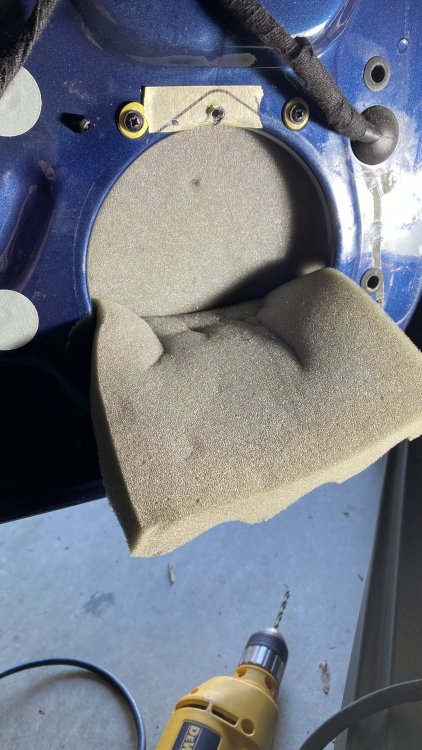
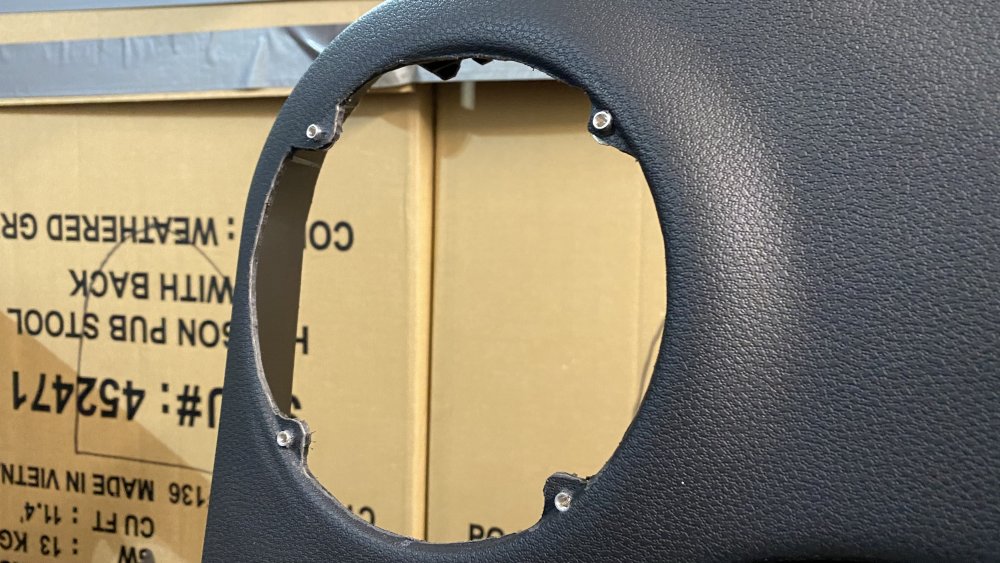
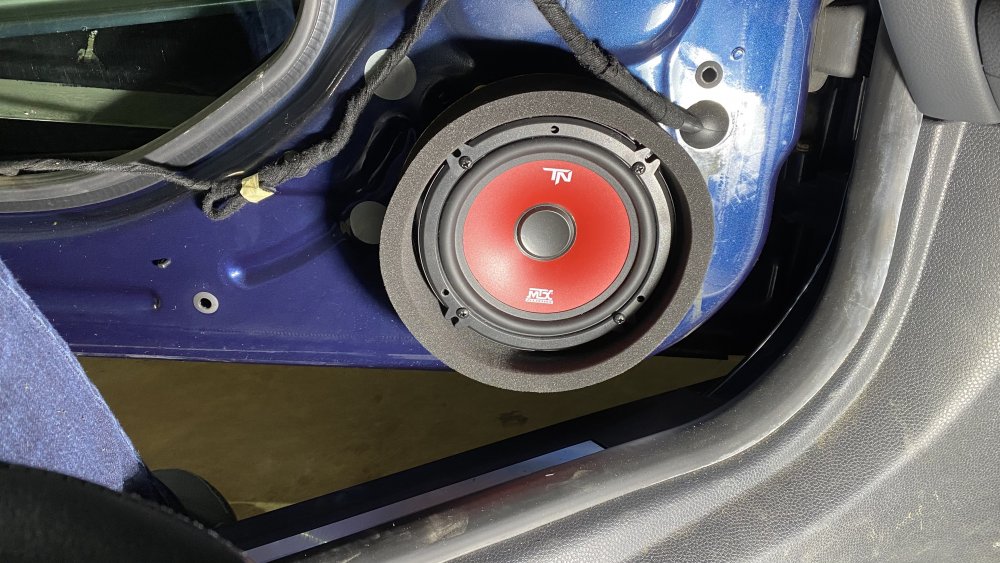
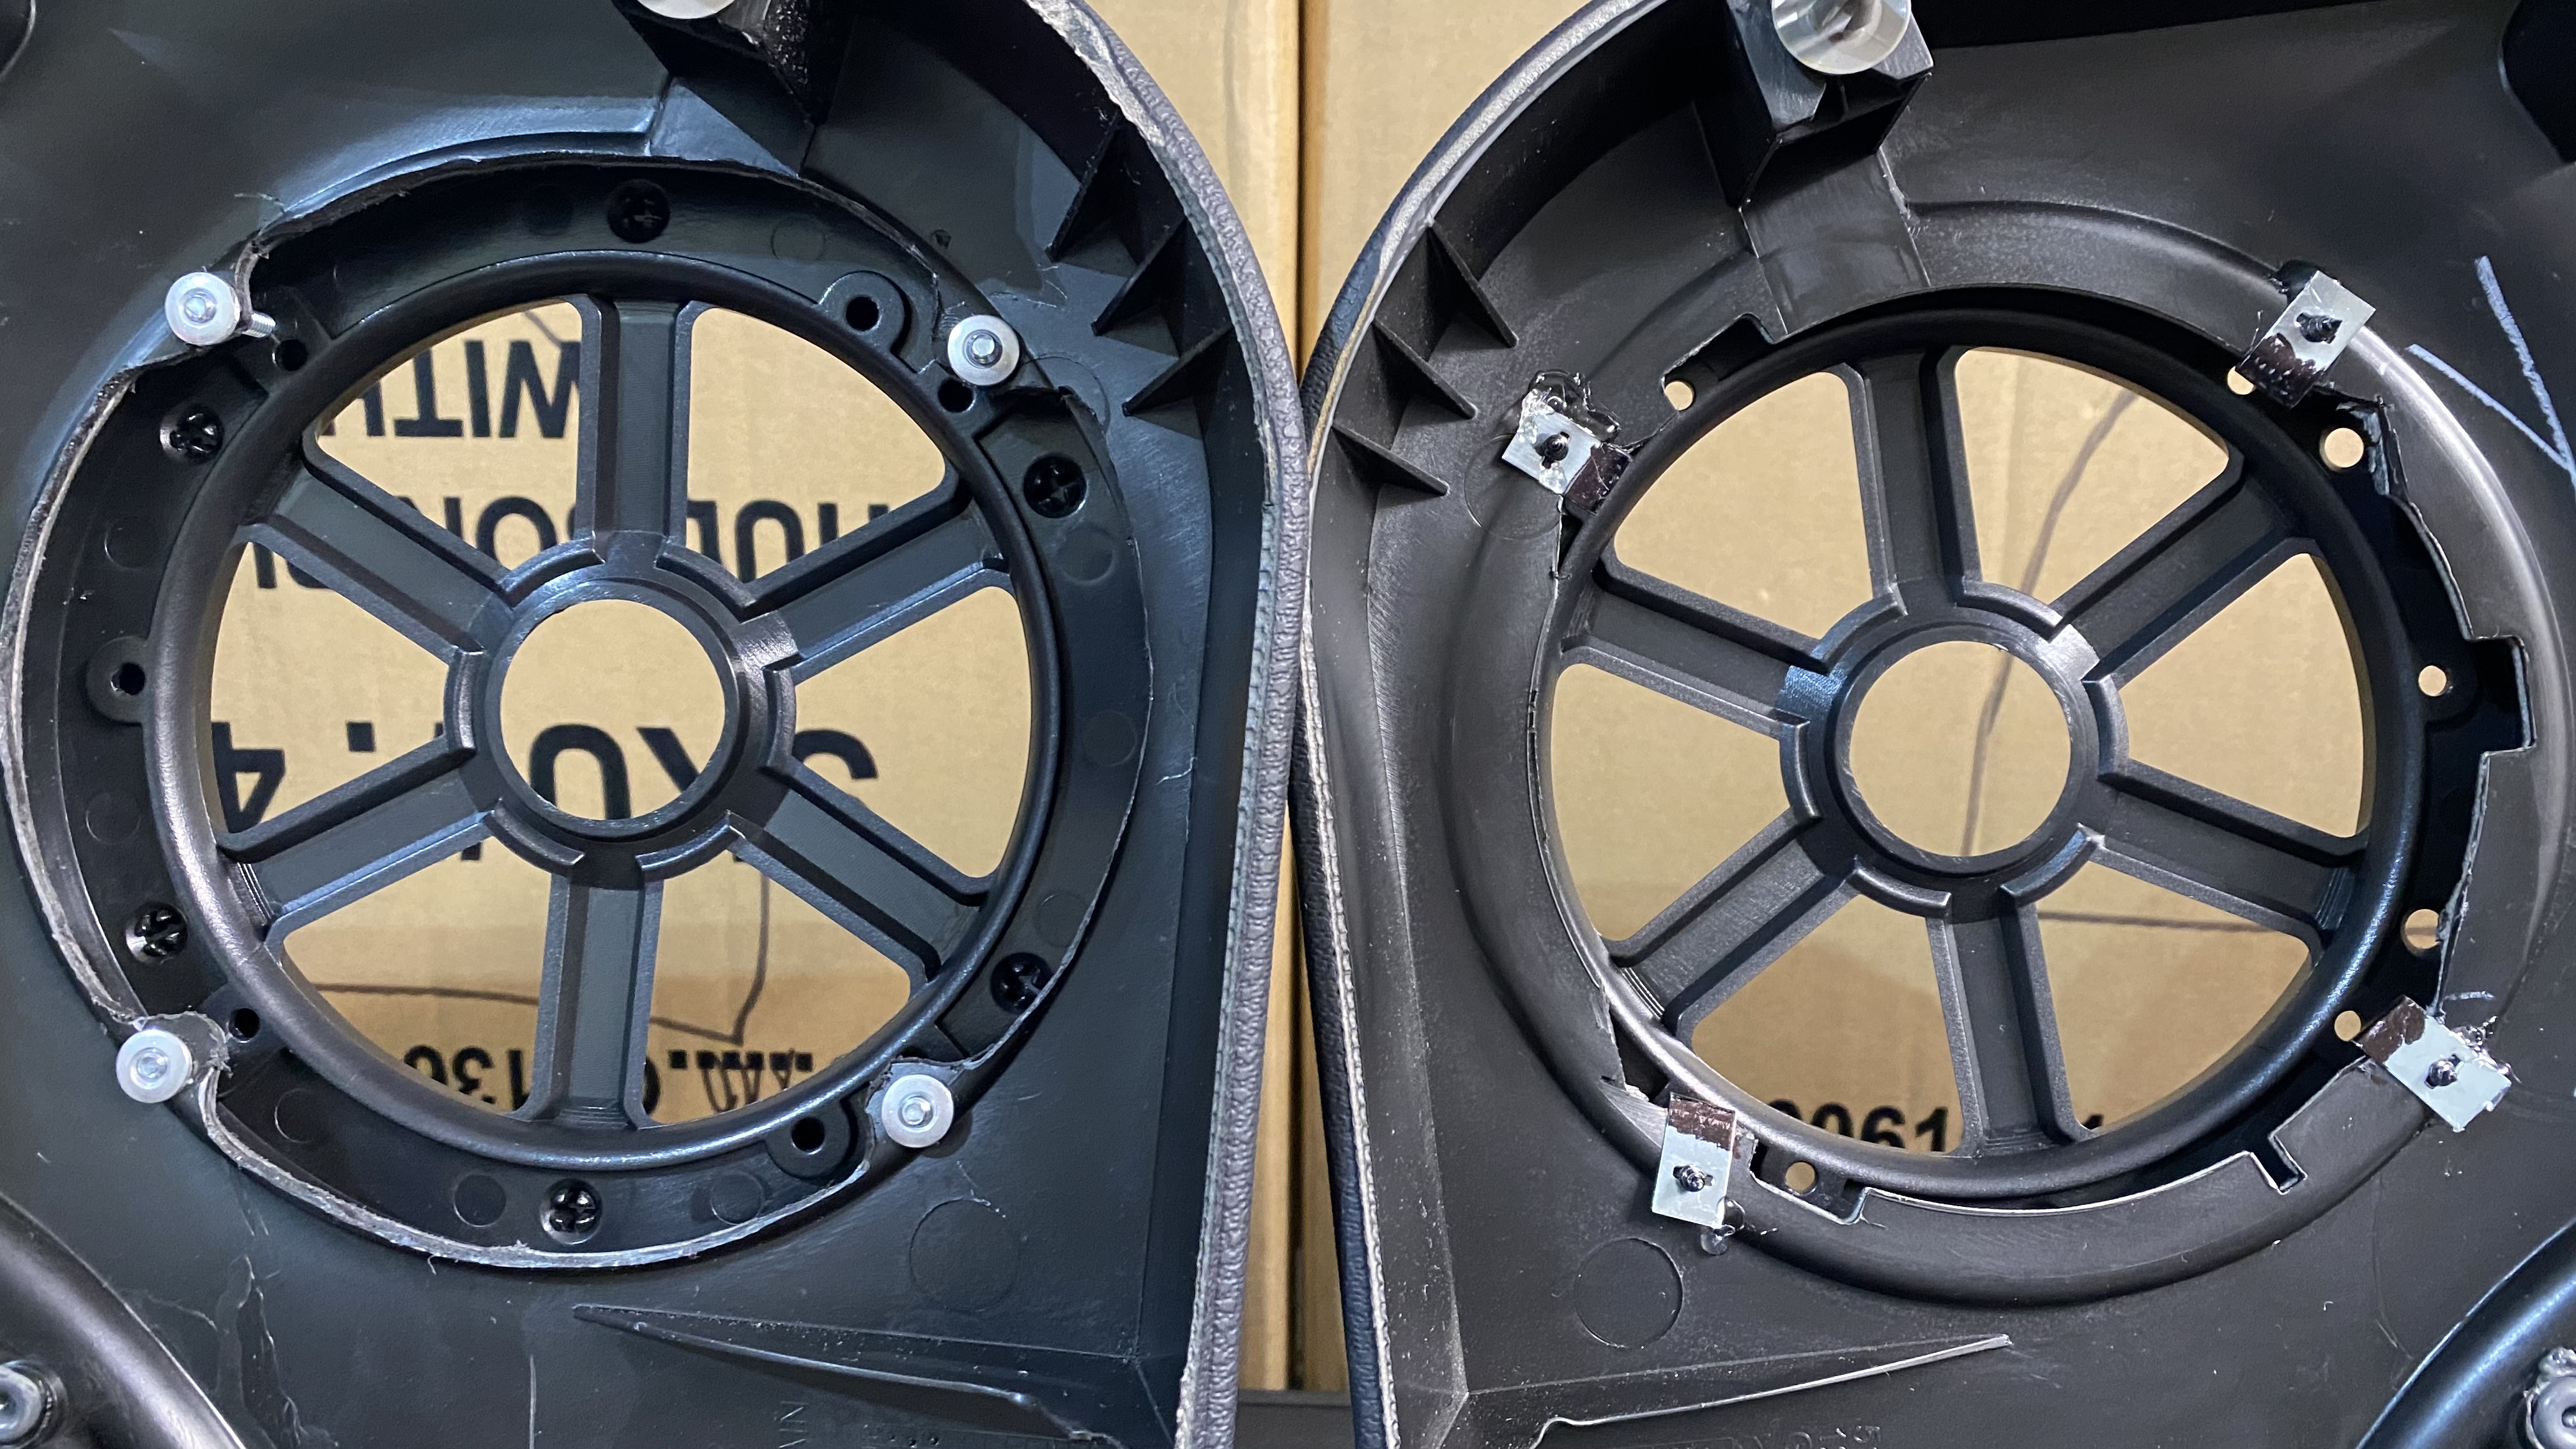
I ordered some MTX Terminator (rear: 6"x9", front 6.5" component). The rears are an easy job, but the fronts require adapters. The rears aren't visible, and I mounted the tweeters behind the stock grills, however, I decided to use the MTX grills for the door speakers.

I modified the stock tweeter mounts to hold the MTX's.

The fronts required a bit more working, starting with drilling a new hole for the adapter.
I then removed the factory grills and enlarged the holes and added mount points for the new grills. I didn't like the hardware that came with the speakers,
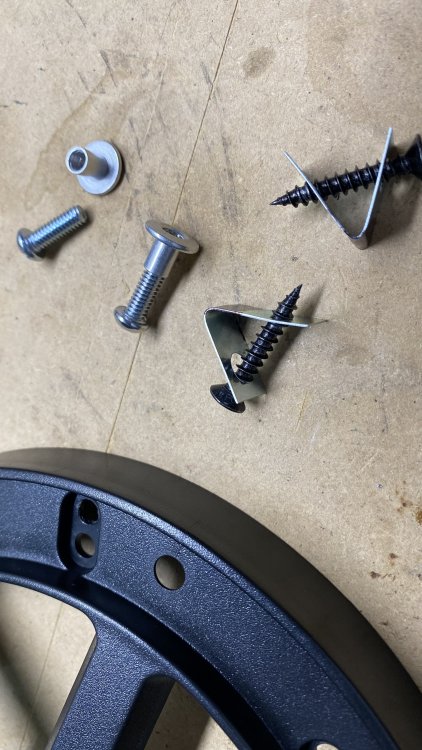
it really looked like crap, so I devised something cleaner. The picture below shows the better option (viewed from back) on the Left.
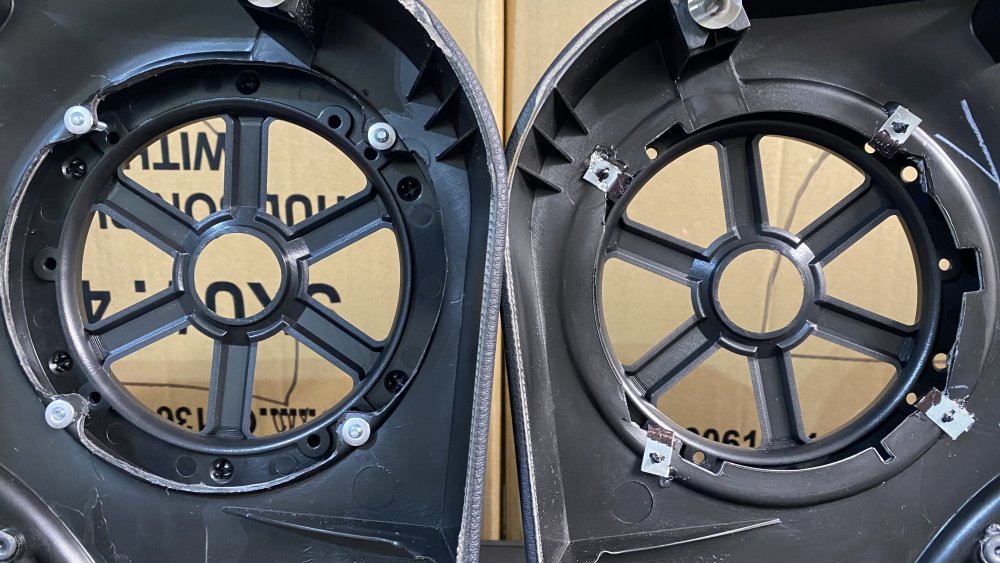
and the view from the front.
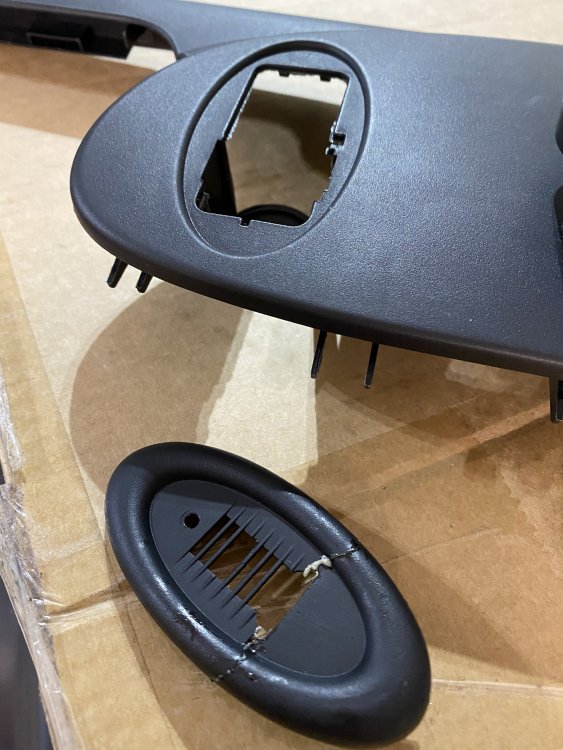
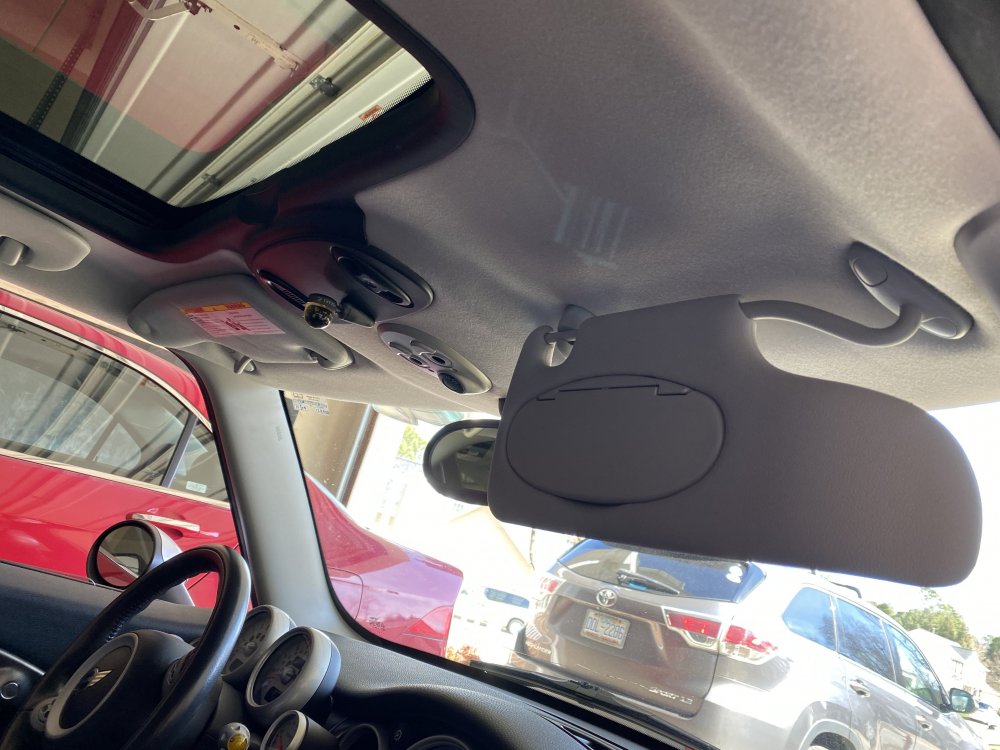
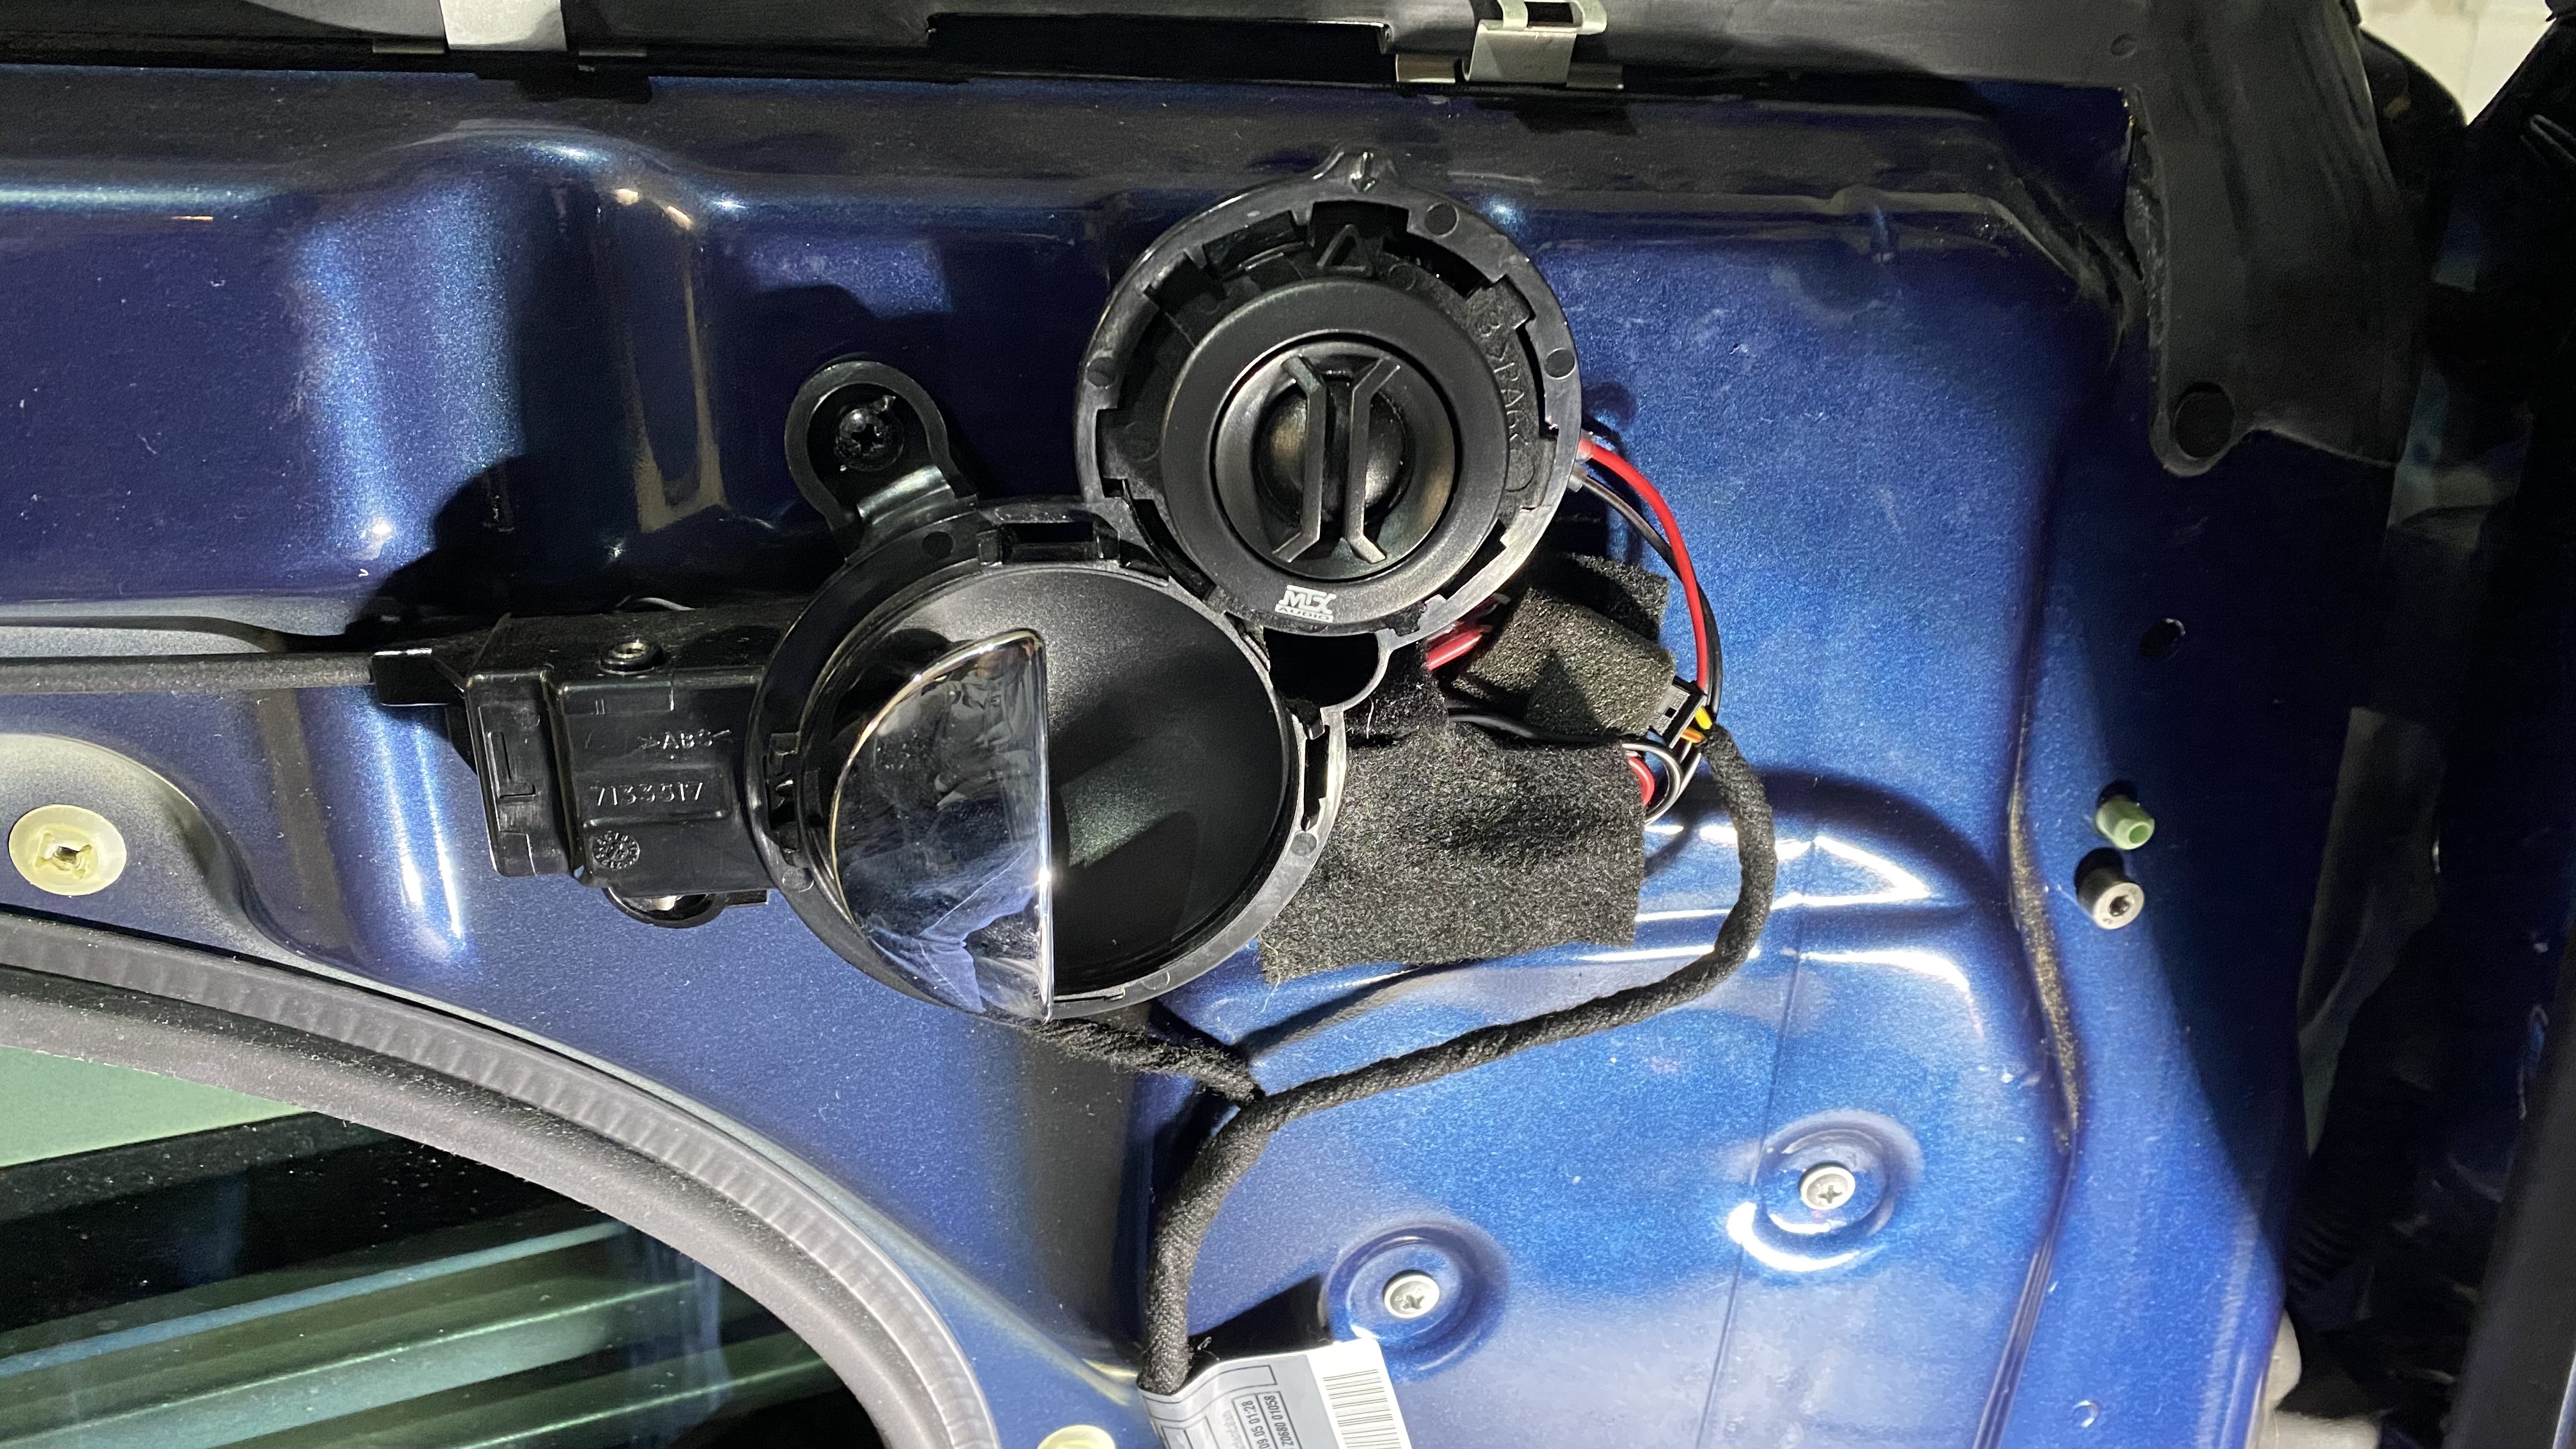
The final piece was to relocate the hands-free microphone that came with my Kenwood. I originally mounted it on the steering column just in front of the gauges. So, I rerouted the wire up to the ceiling and placed the microphone into the factory location for the MINI OEM hands-free kit. This of course meant the sunroof switch moved to the passenger side which took a while to get used to. The grill piece had become brittle and broke, so I had to order a replacement. (broken one pictured)
While I had the door panels off, I realized that the passenger side puddle light wasn't connected. I don't recall ever having any service done on that door, so it's a mystery as to how that happened!
So, just from taking the car in for service at various shops over the time I've owned it seems to have resulted in a lot of little issues, like broken clips, loose connections... etc. I'm not trying to point any fingers, but it seems to show how important it is to find a really quality shop! It also pays to get to know your car, particular if you plan to keep it a long time like I've decided.
Equipment List:
Front and Rear speakers - This is really based on personal preference, budget, and other factors.
Metra 72-9301 Speaker Wiring Harness (2) - needed for both front and back
Scosche SASCN656 Speaker Mounting Brackets -for front speakers
Stinger Roadkill RKFR6 FAST Rings
Hillman 1/4" Threaded Posts and #8-32 x 1/4" Machine Screws - I got these at Lowe's Home Improvement, makes for a nicer way to mount grills
-
2
-
-
So, this year I've done a lot of work on B.A. to get him back in good condition. After 15 years and 130K miles, a MINI is going to need some work. I wanted to capture it all here. Maybe this information will be helpful to others. Particular first gen owners.
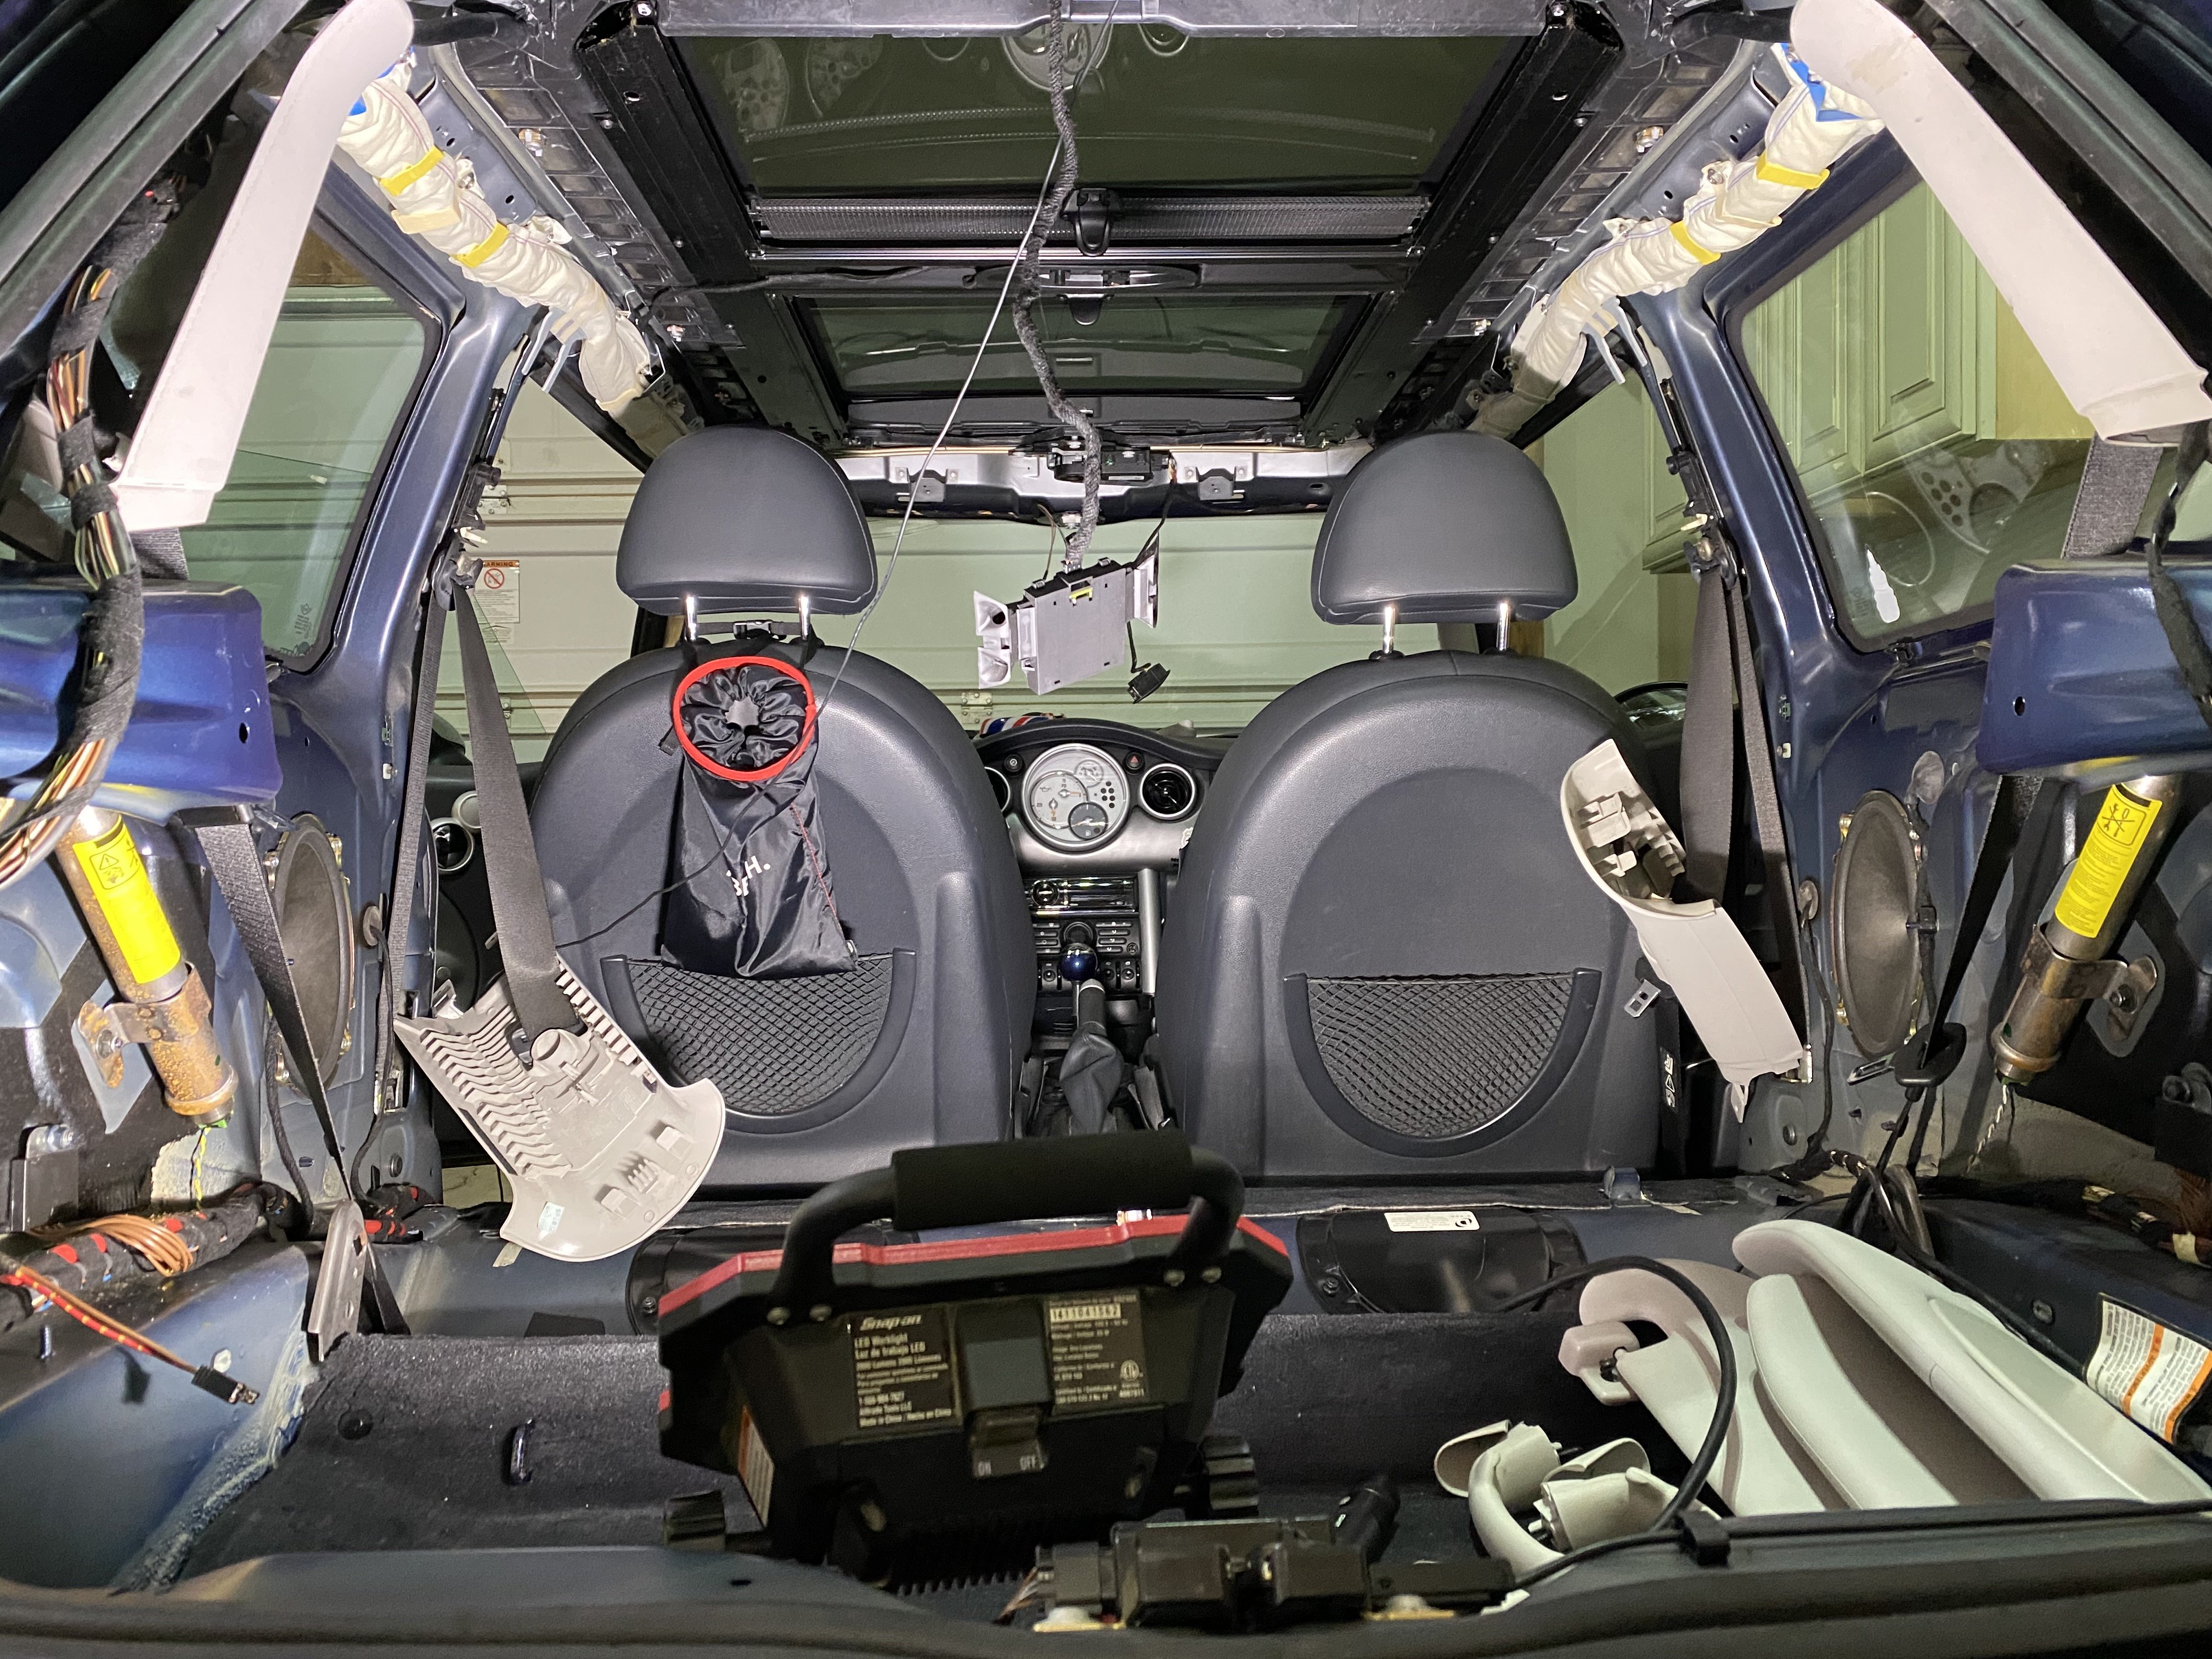
There were several issues that I wanted to fix, two main ones being 1. fix sagging headliner 2. stop water in the boot. A few other things got taken care of also. The first thing was to completely strip out the interior.
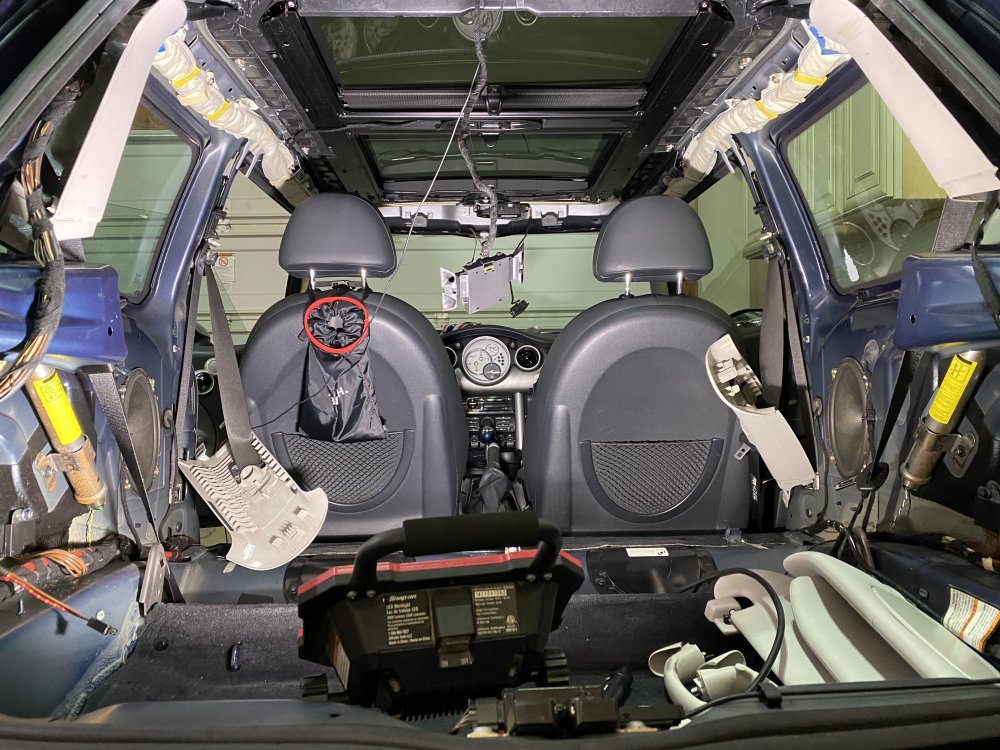
AH! The inside is on the outside!

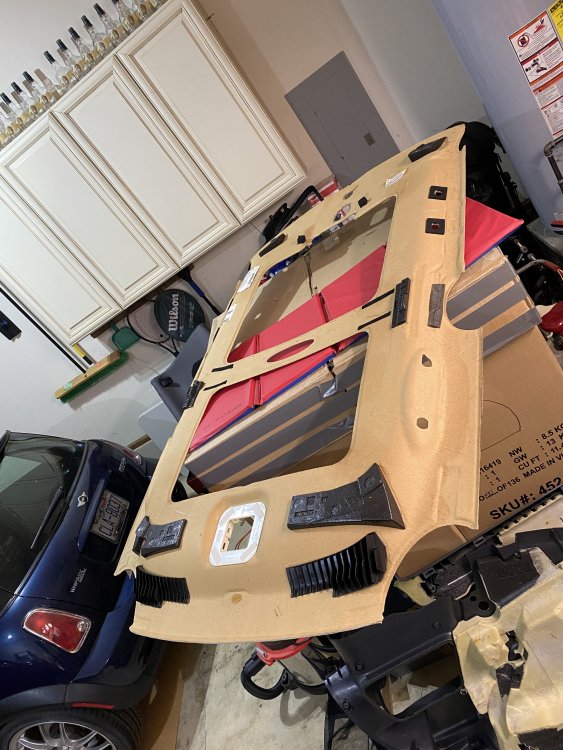
I took the headliner to a local upholstery shop to be redone, they did a great job.
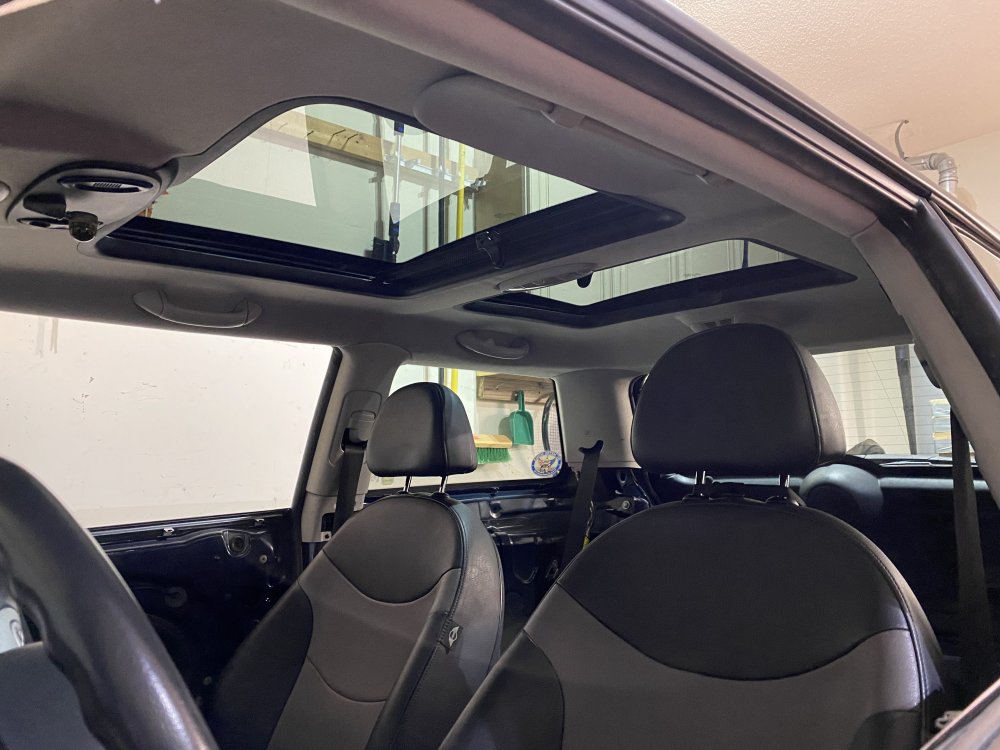
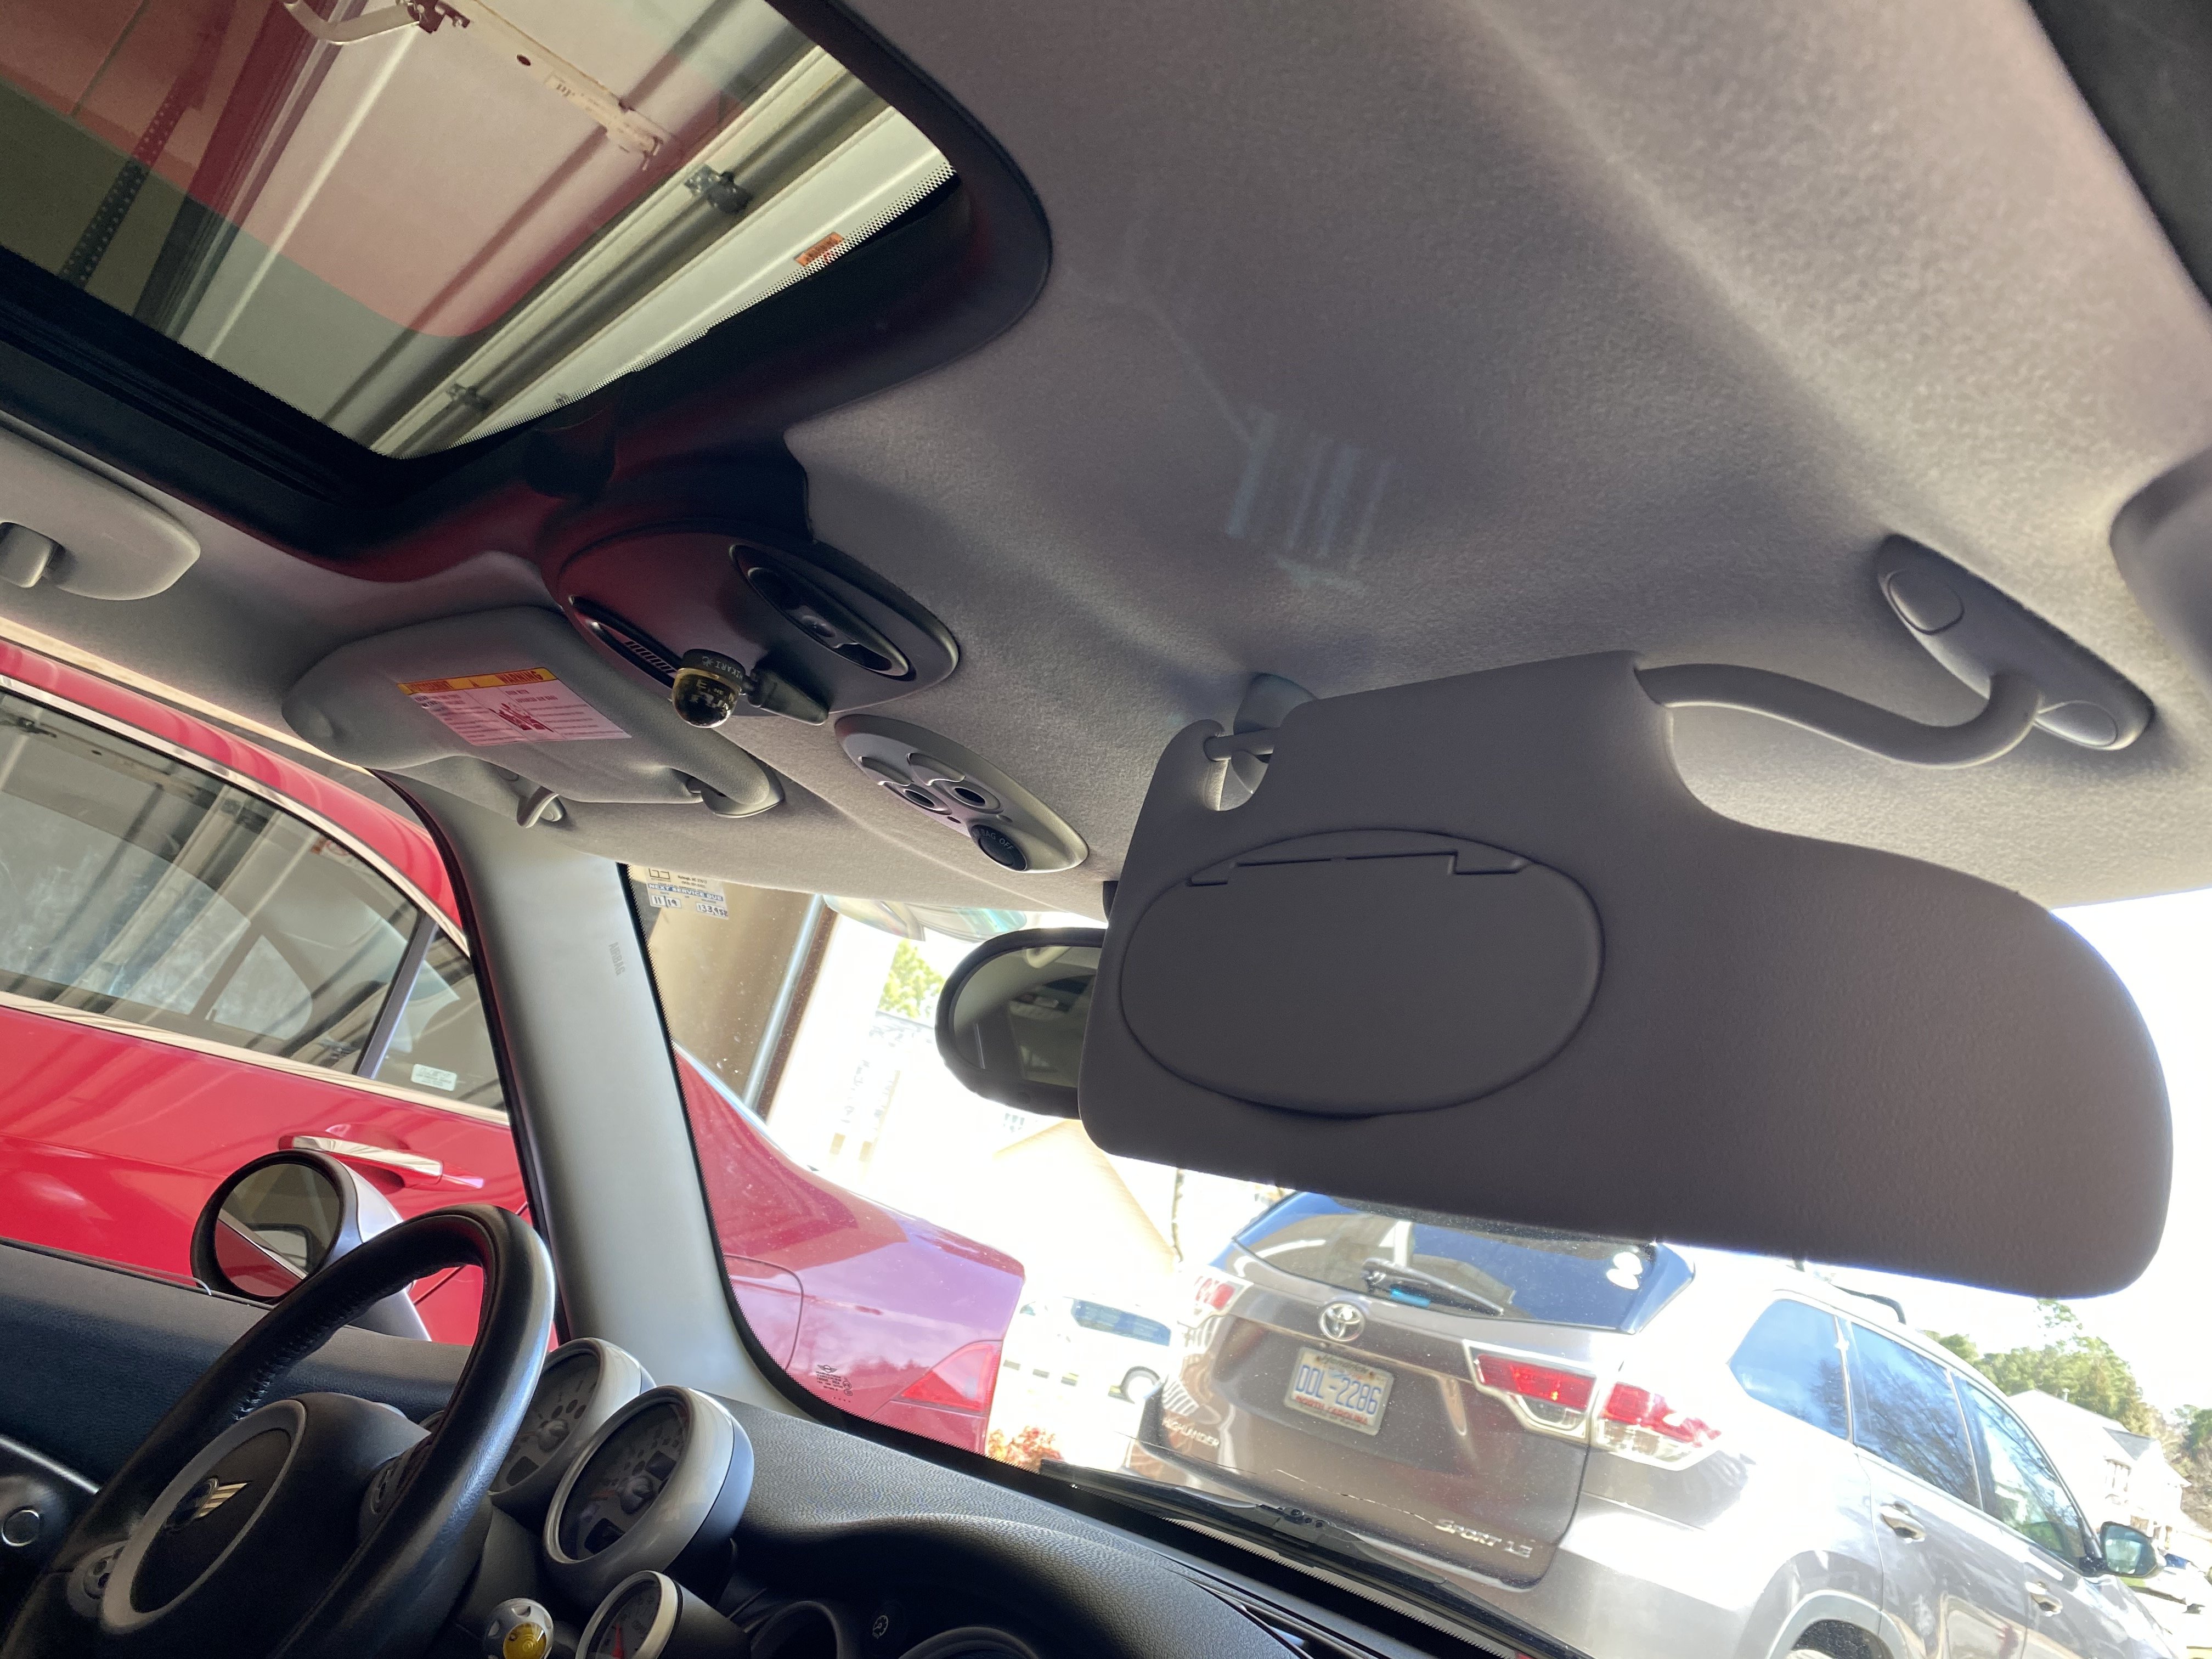
This was a good opportunity to do a deep clean of the interior. Also, I replaced a few broken clips, fixed the emergency release handle for the gas filler, and rerouted my satnav antenna wire. As for the water problem, I discovered that one of the sunroof drains wasn't securely connected, so I fixed that as well which seems to have solved the problem. I've tested with a pressure washer and no leaks! Finally, both of the sun visor mirror flaps were broken, I tried to fix them, but couldn't - they might be the worst designed part on the car! I ordered new ones (not cheap) and it was worth it to have those working again.
The next thing before putting it all back together was to replace the tired factory speakers. I'll do a separate thread on that.
Equipment List:
Interior Panel Clips (The yellow ones)
-
3
-
-
So, this year I've done a lot of work on B.A. to get him back in good condition. After 15 years and 130K miles, a MINI is going to need some work. I wanted to capture it all here. Maybe this information will be helpful to others. Particular first gen owners.
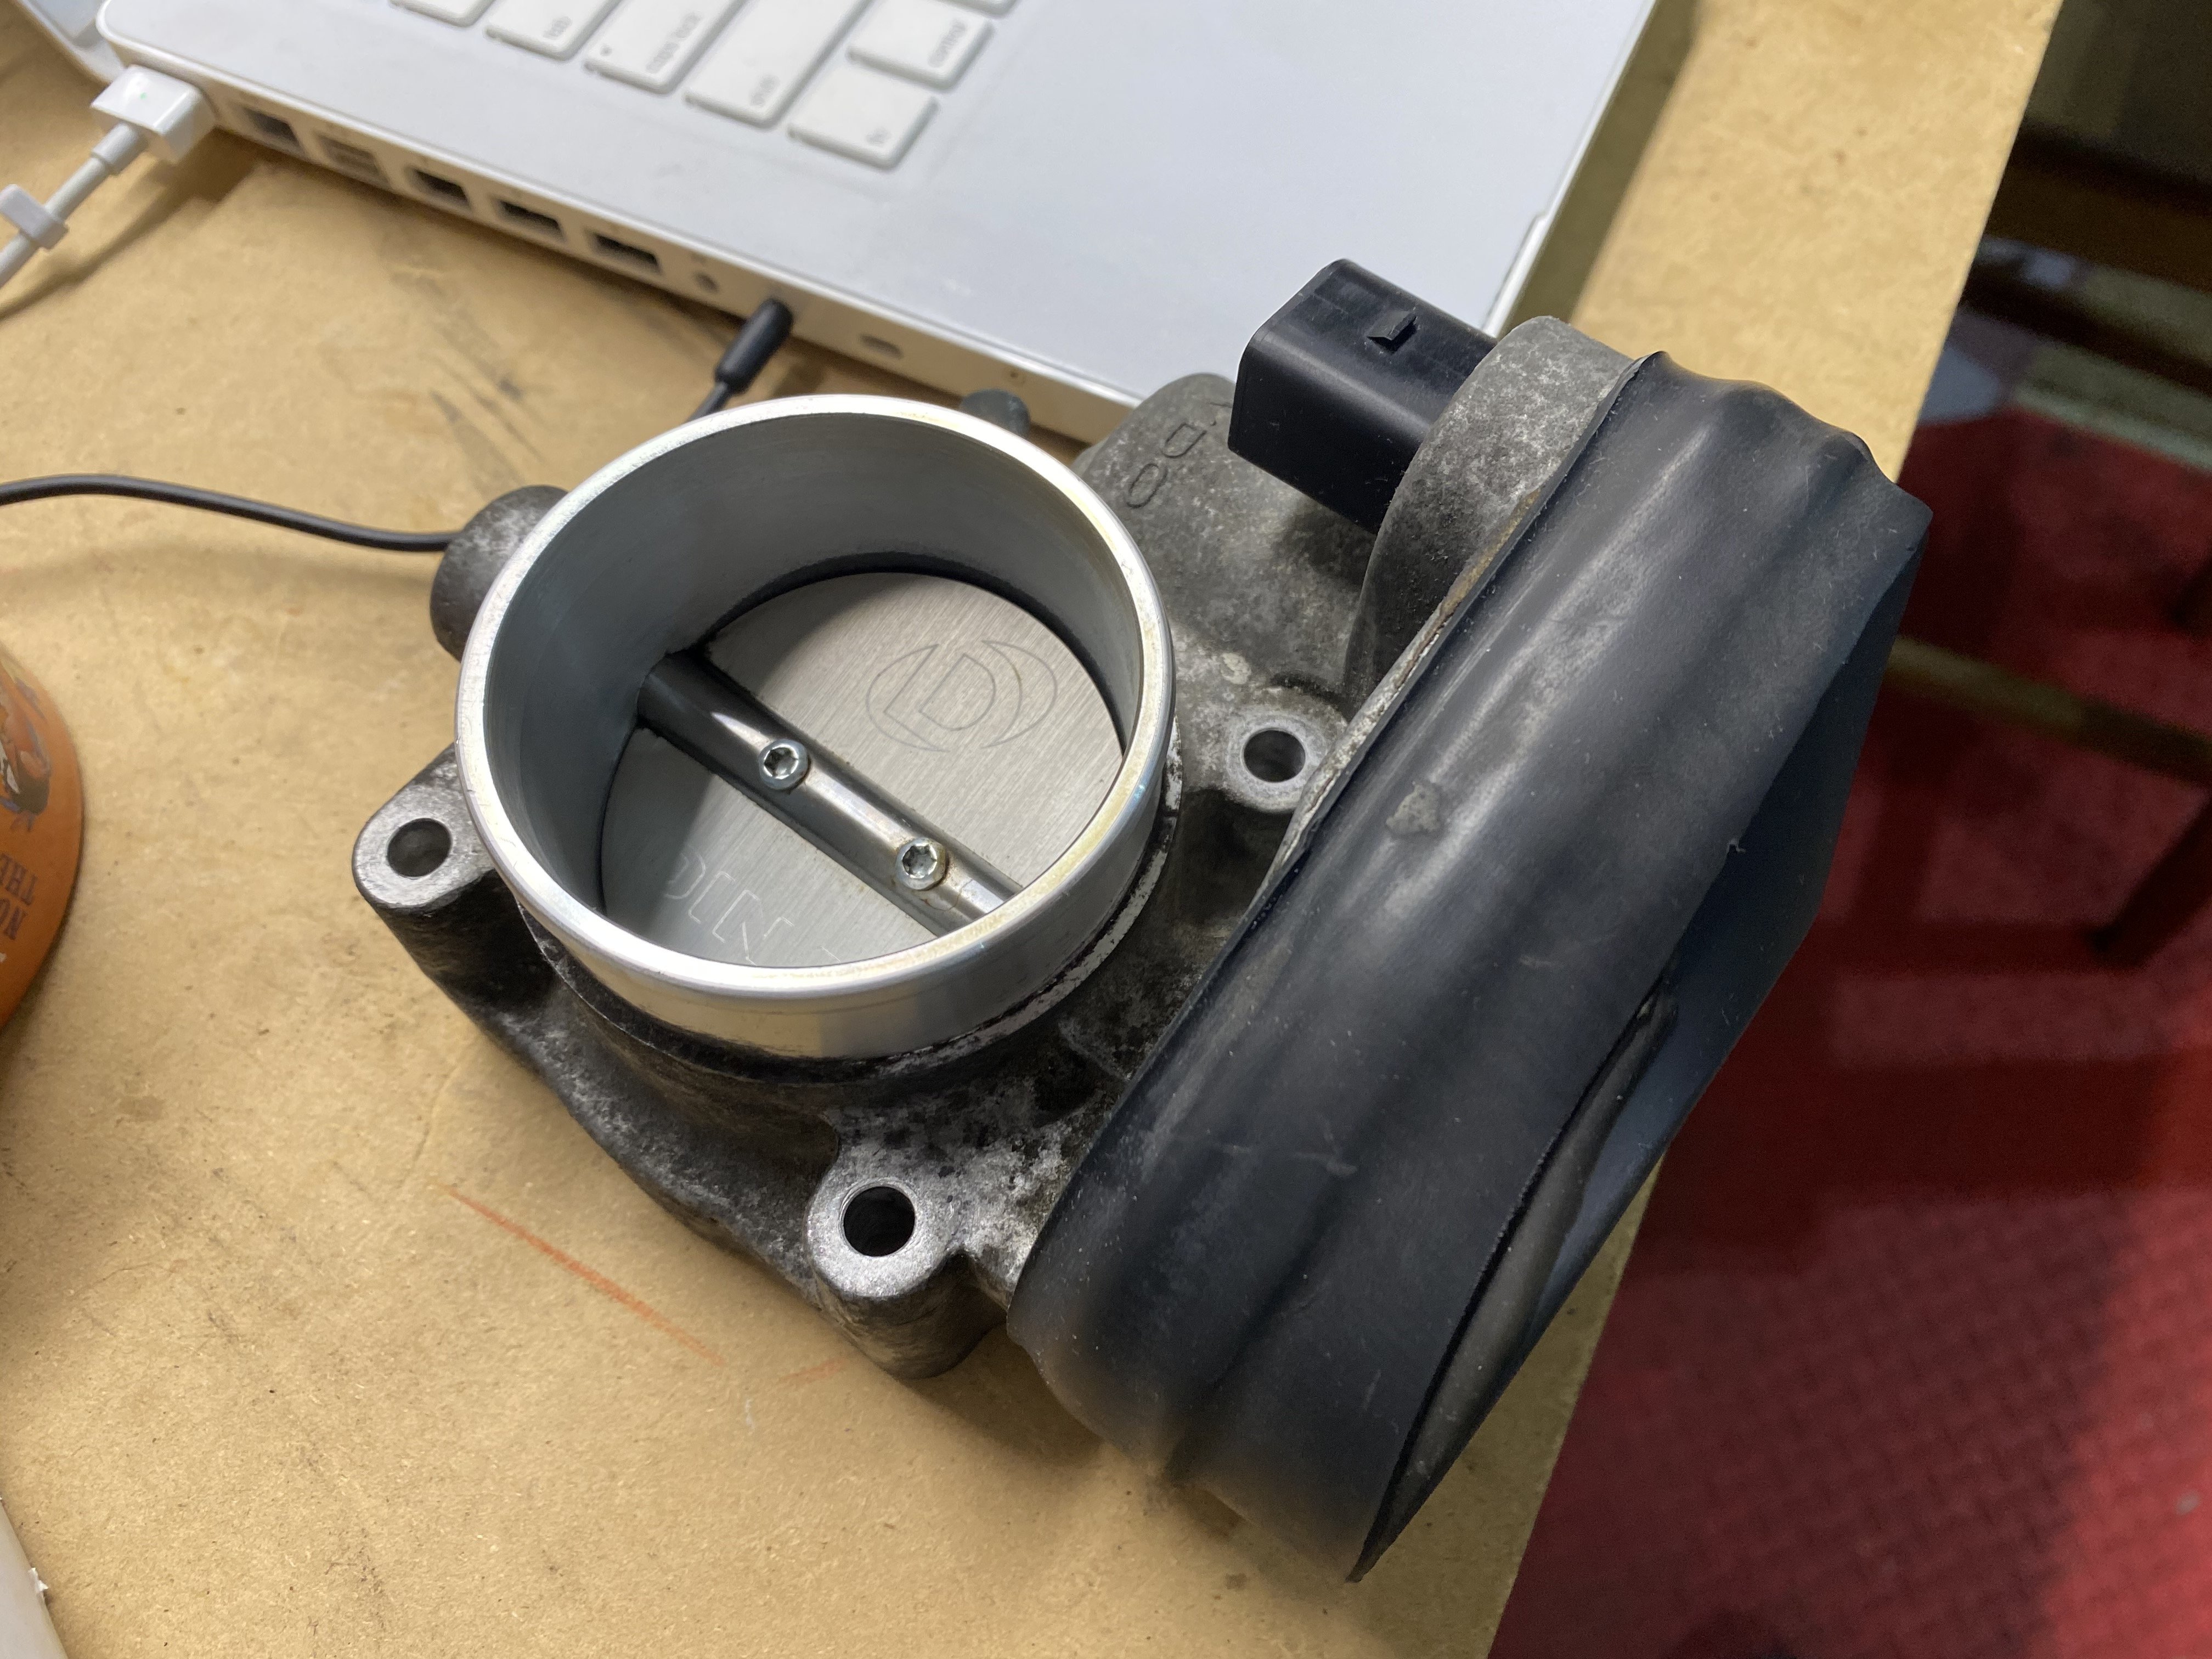
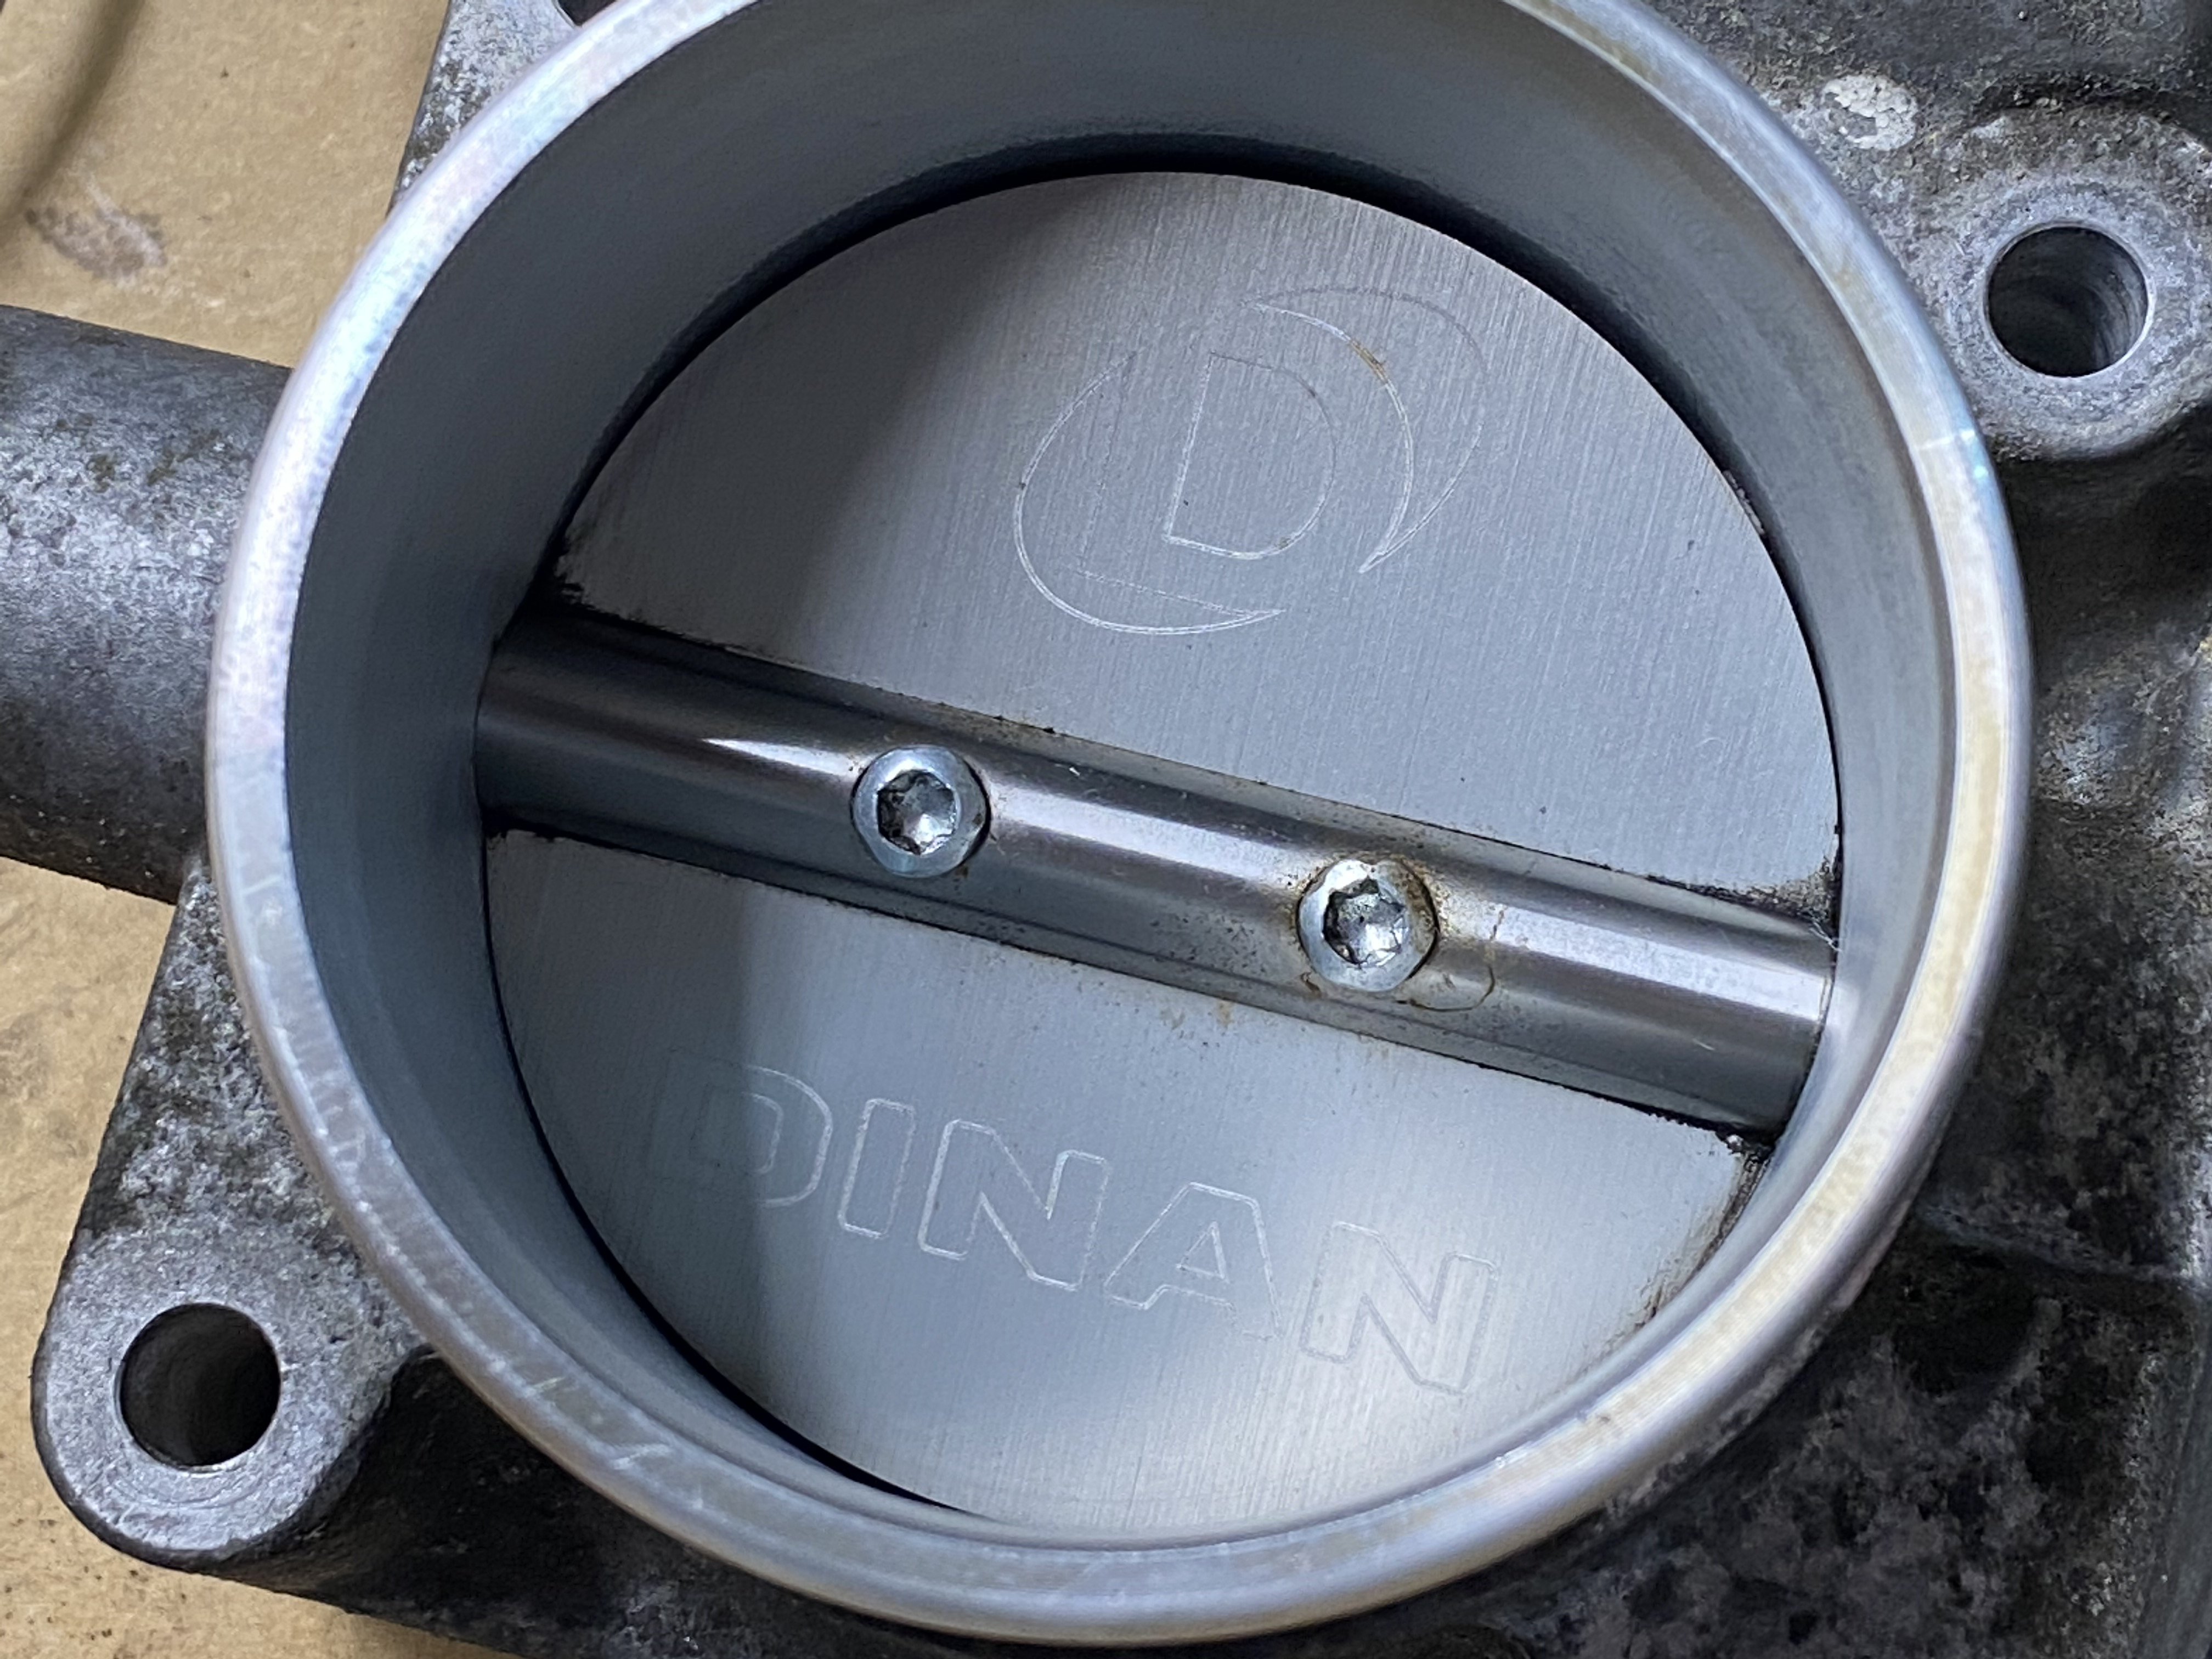
After ignition, I replaced the by-pass valve (MINI officially refers to it as "shut-off" valve) and thoroughly cleaned the throttle body. I also replaced the throttle body gasket. I have misplaced some of the pictures, but will update this post if I can find them. For now, here are some pictures of the cleaned up throttle body.
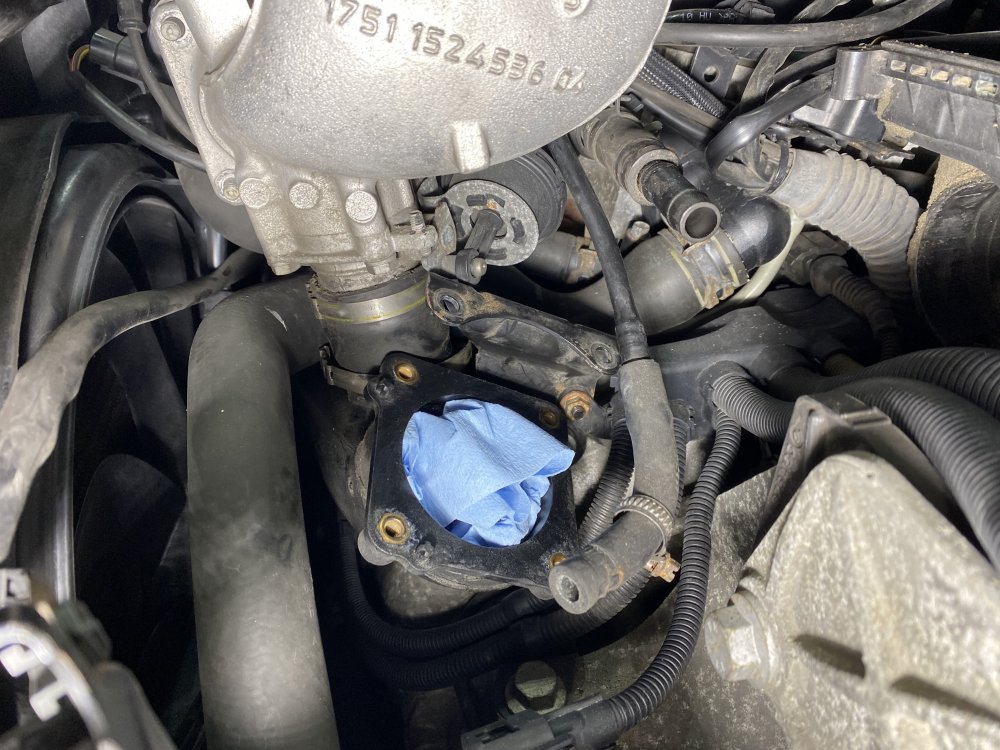


After getting the Bypass-valve and Throttle-body back on, I replaced the left and right boots for the Intercooler. They are rubber and had gotten very hard and deformed from the clamps.

Equipment List:
OEM MINI Shut-off Valve - more generally referred to as by-pass valve.
OEM Intercooler Couplers Right & Left - more generally referred to as boots.
-
3
-
-
So, this year I've done a lot of work on B.A. to get him back in good condition. After 15 years and 130K miles, a MINI is going to need some work. I wanted to capture it all here. Maybe this information will be helpful to others. Particular first gen owners.
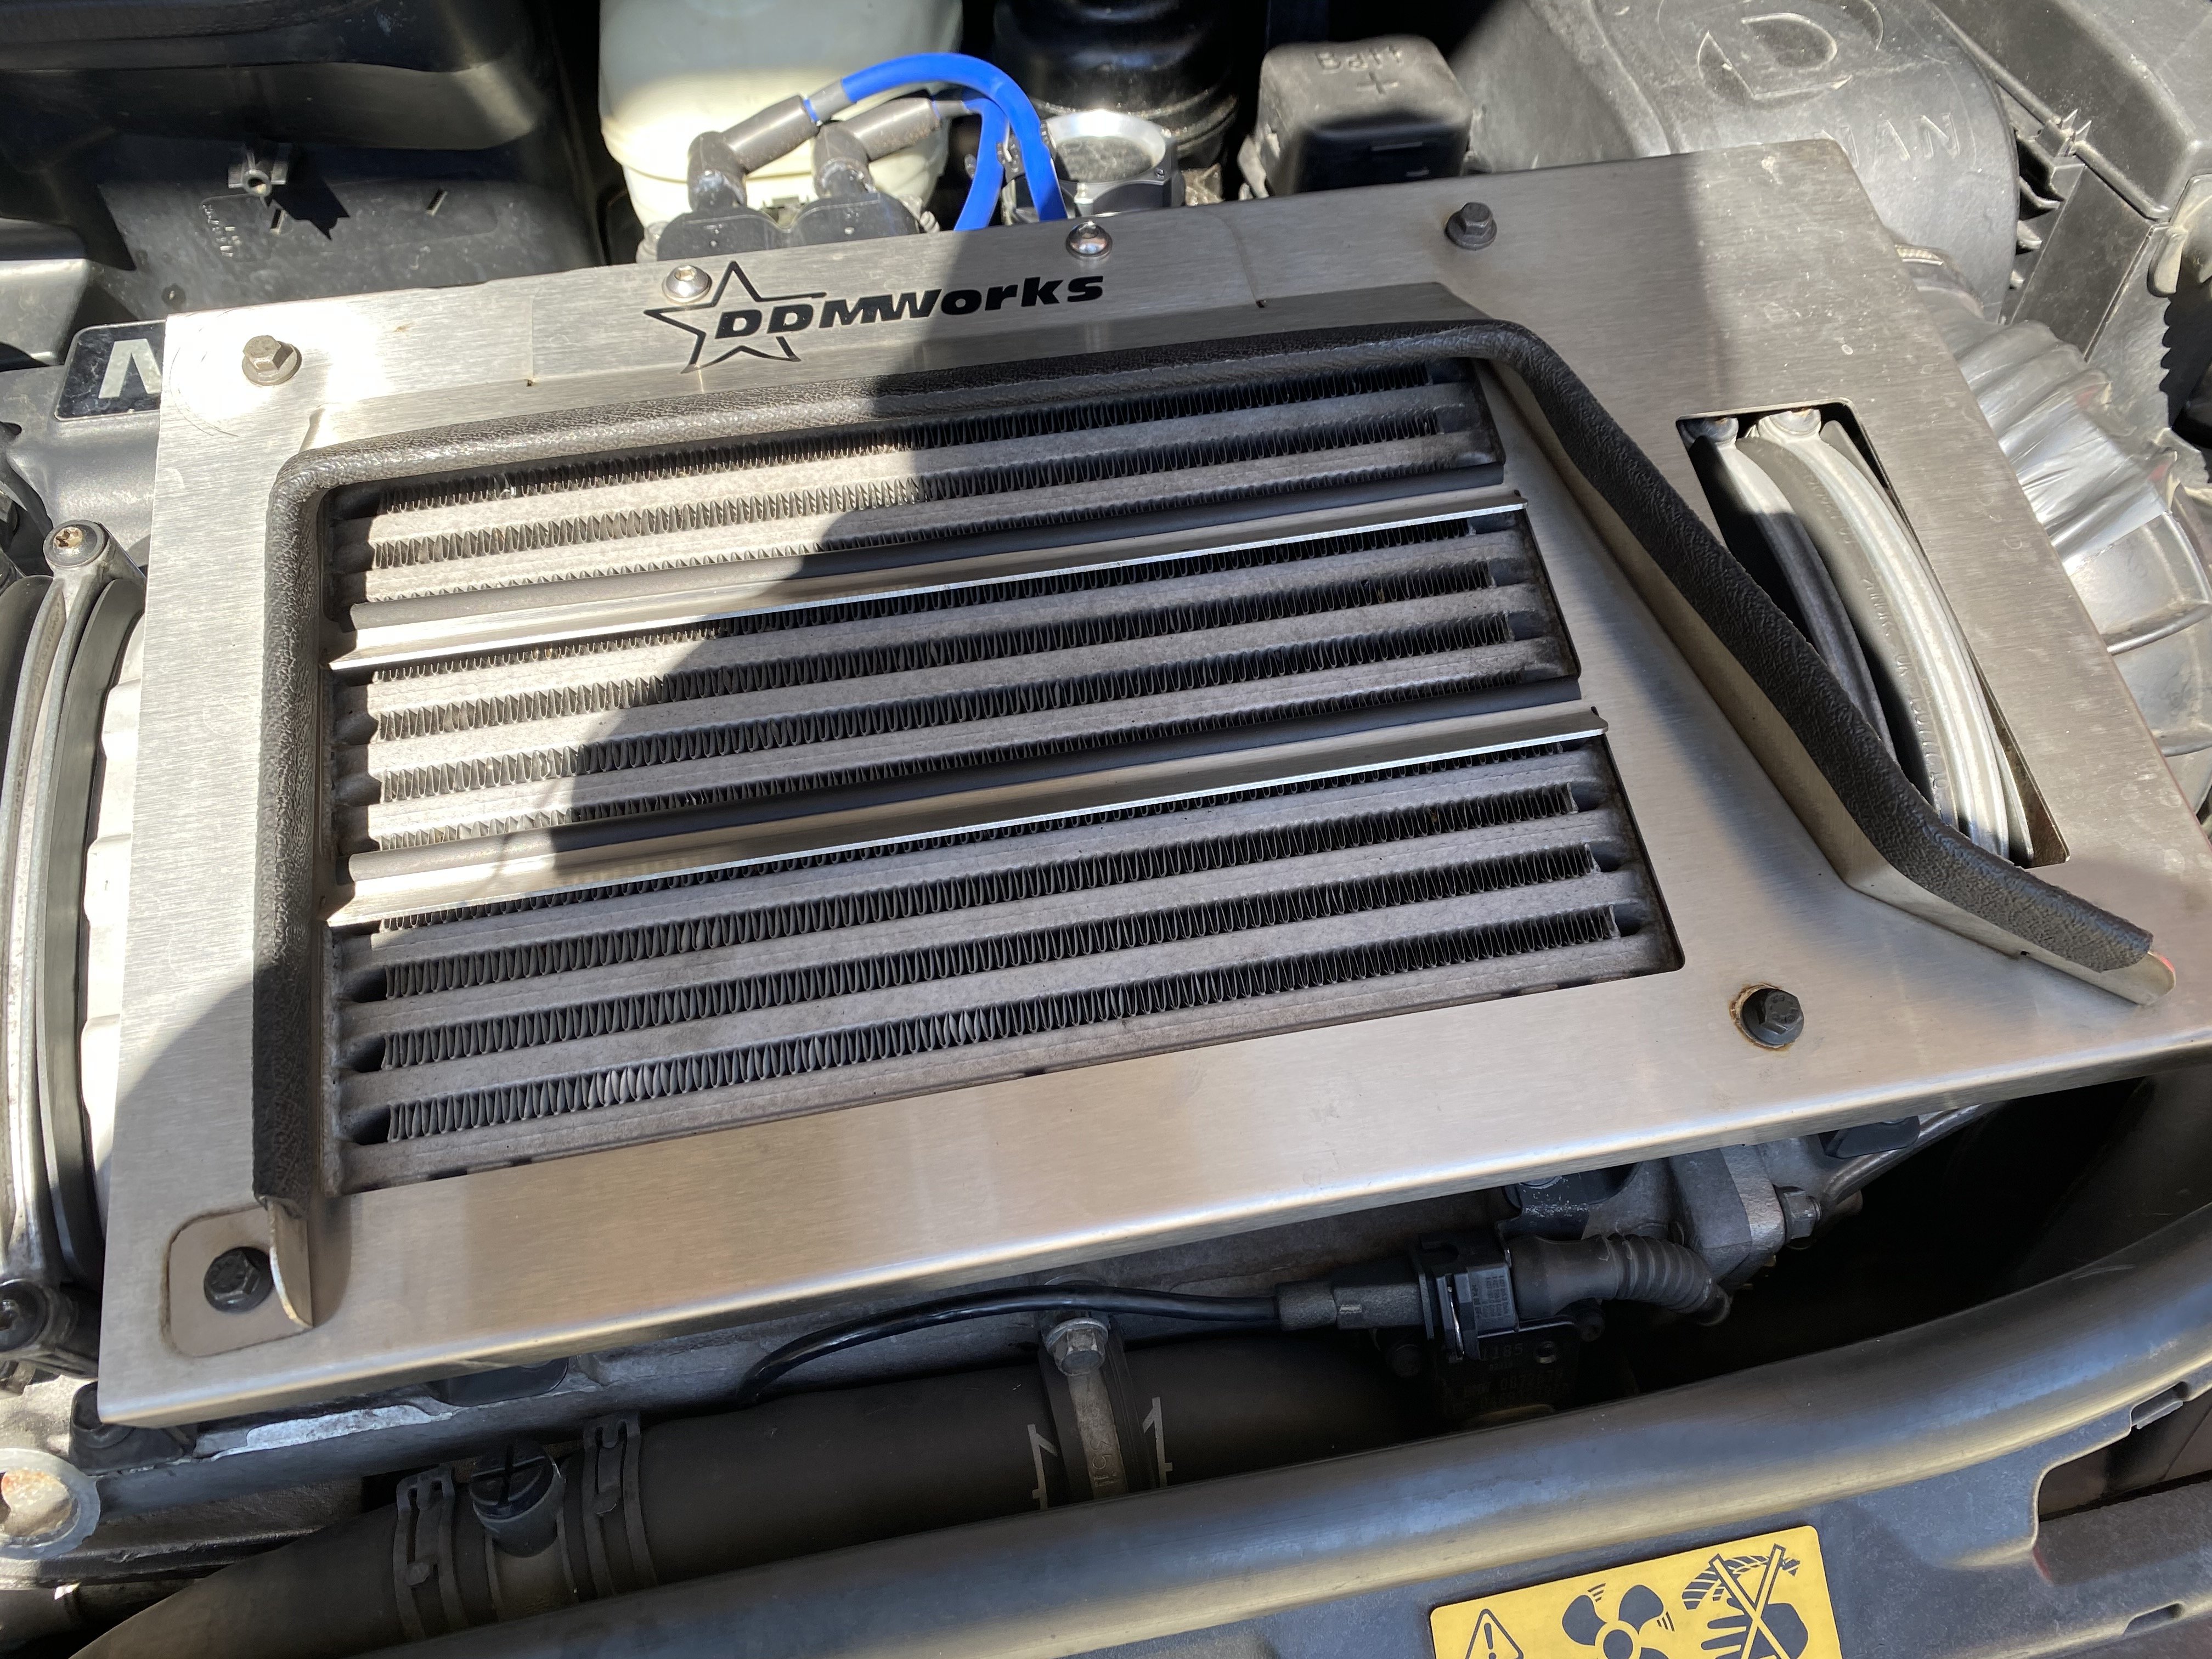
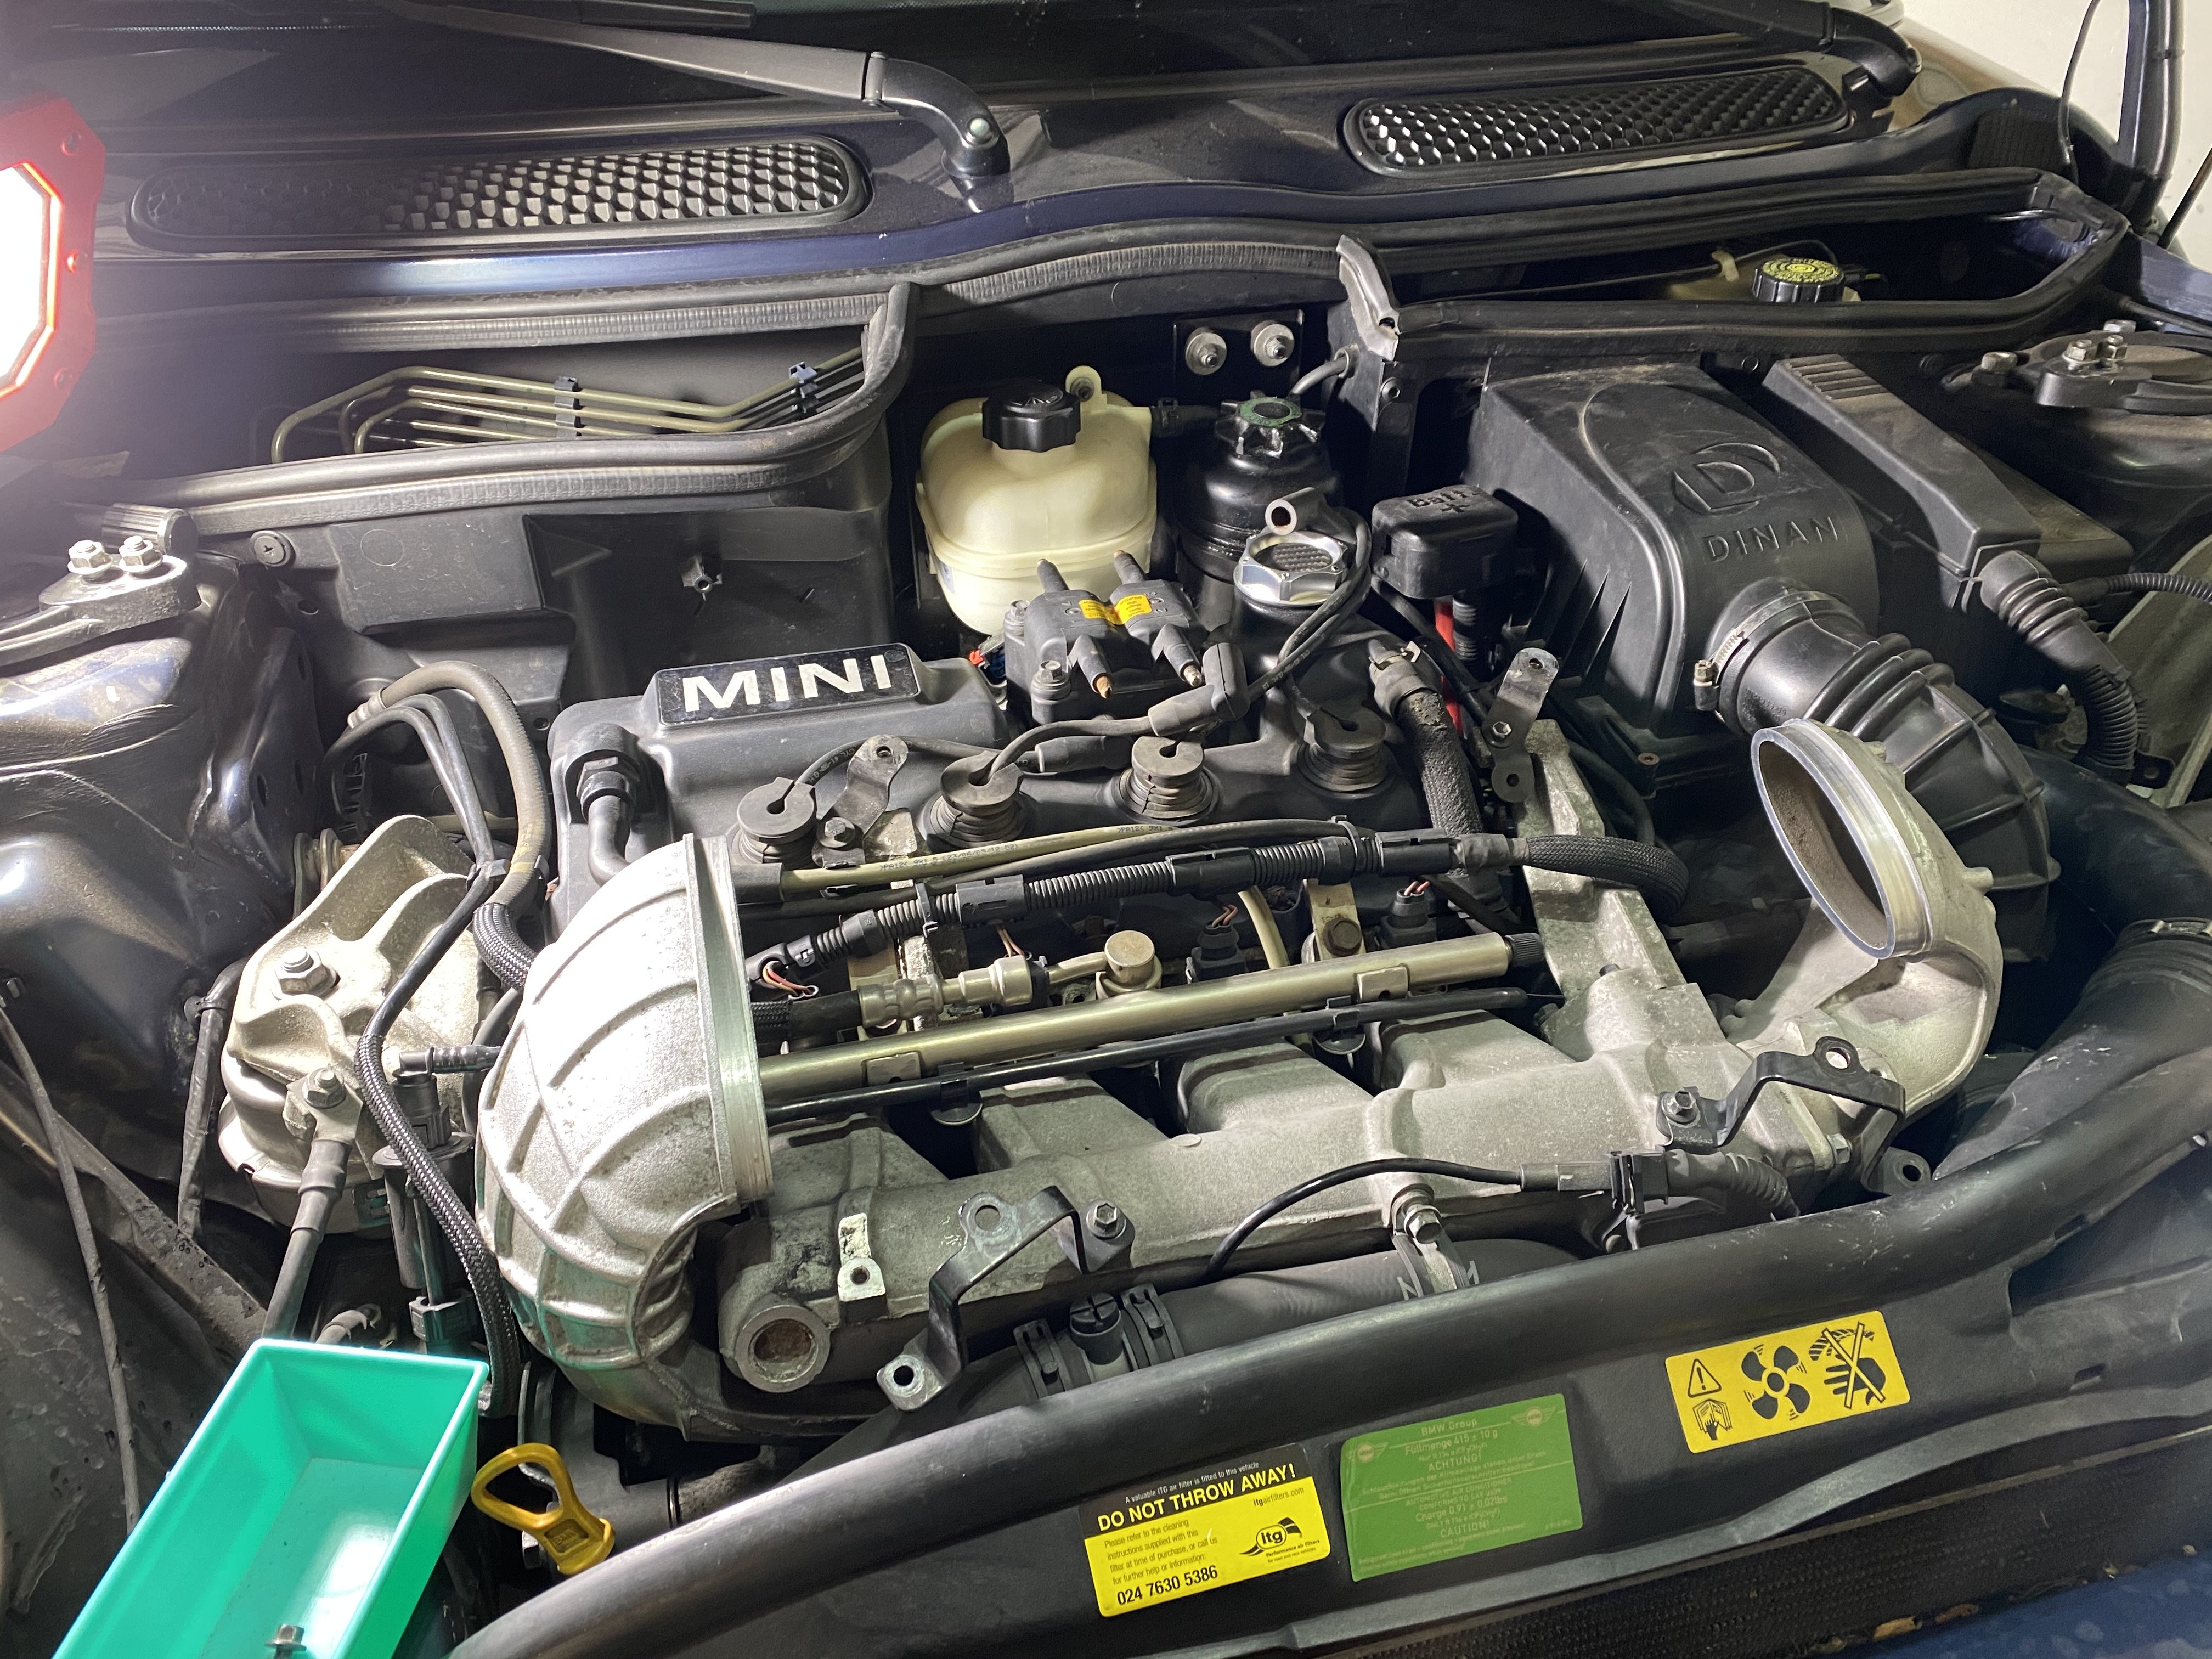
I got started in February, and the first job was to refresh the ignition system. So, I replaced the ignition coil, spark plugs, and spark plug wires. If you have the stock intercooler, then this isn't too difficult, however, if you have a larger aftermarket intercooler, or the JCW GP, like I have, then it needs to be removed since it blocks access to the spark plugs.
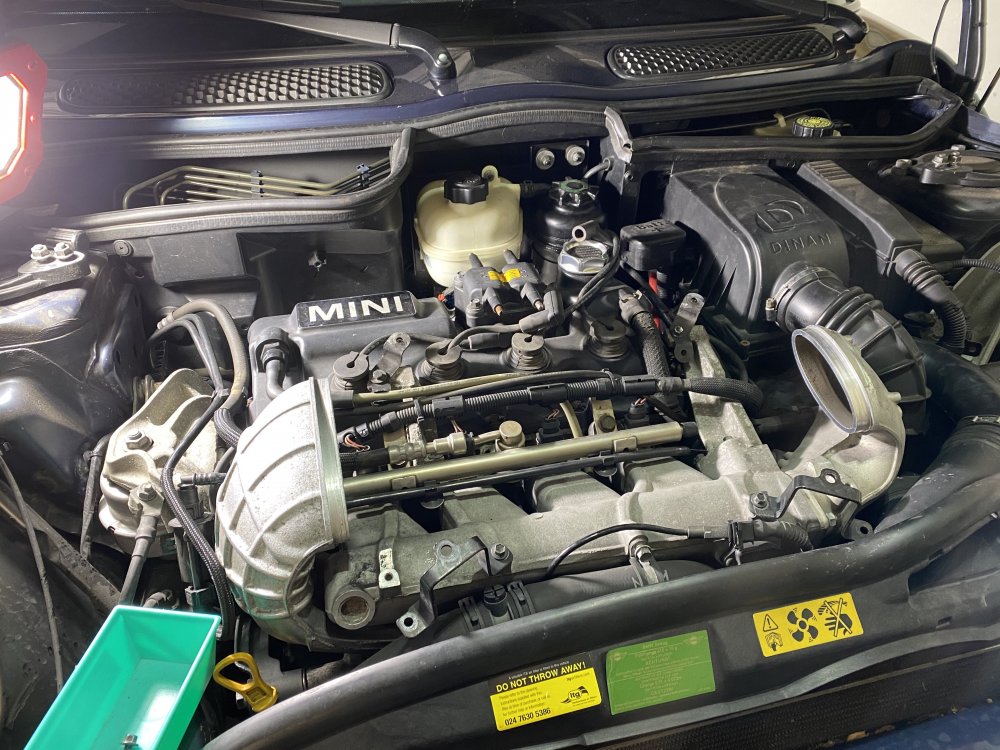
Once the Intercooler is out of the way, old stuff can be removed. I ordered a new 'OEM' coil from Way Motor Works. The unit I received is made by BERU and is one of the OEM suppliers. You can see that there was quite a lot of corrosion on the contact posts.
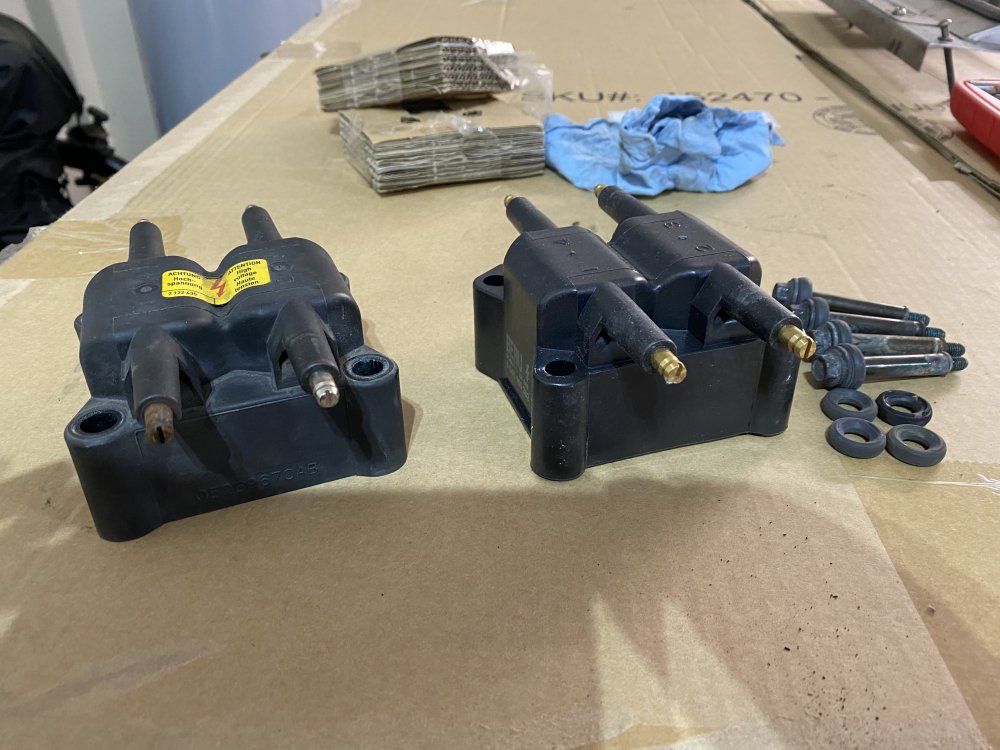
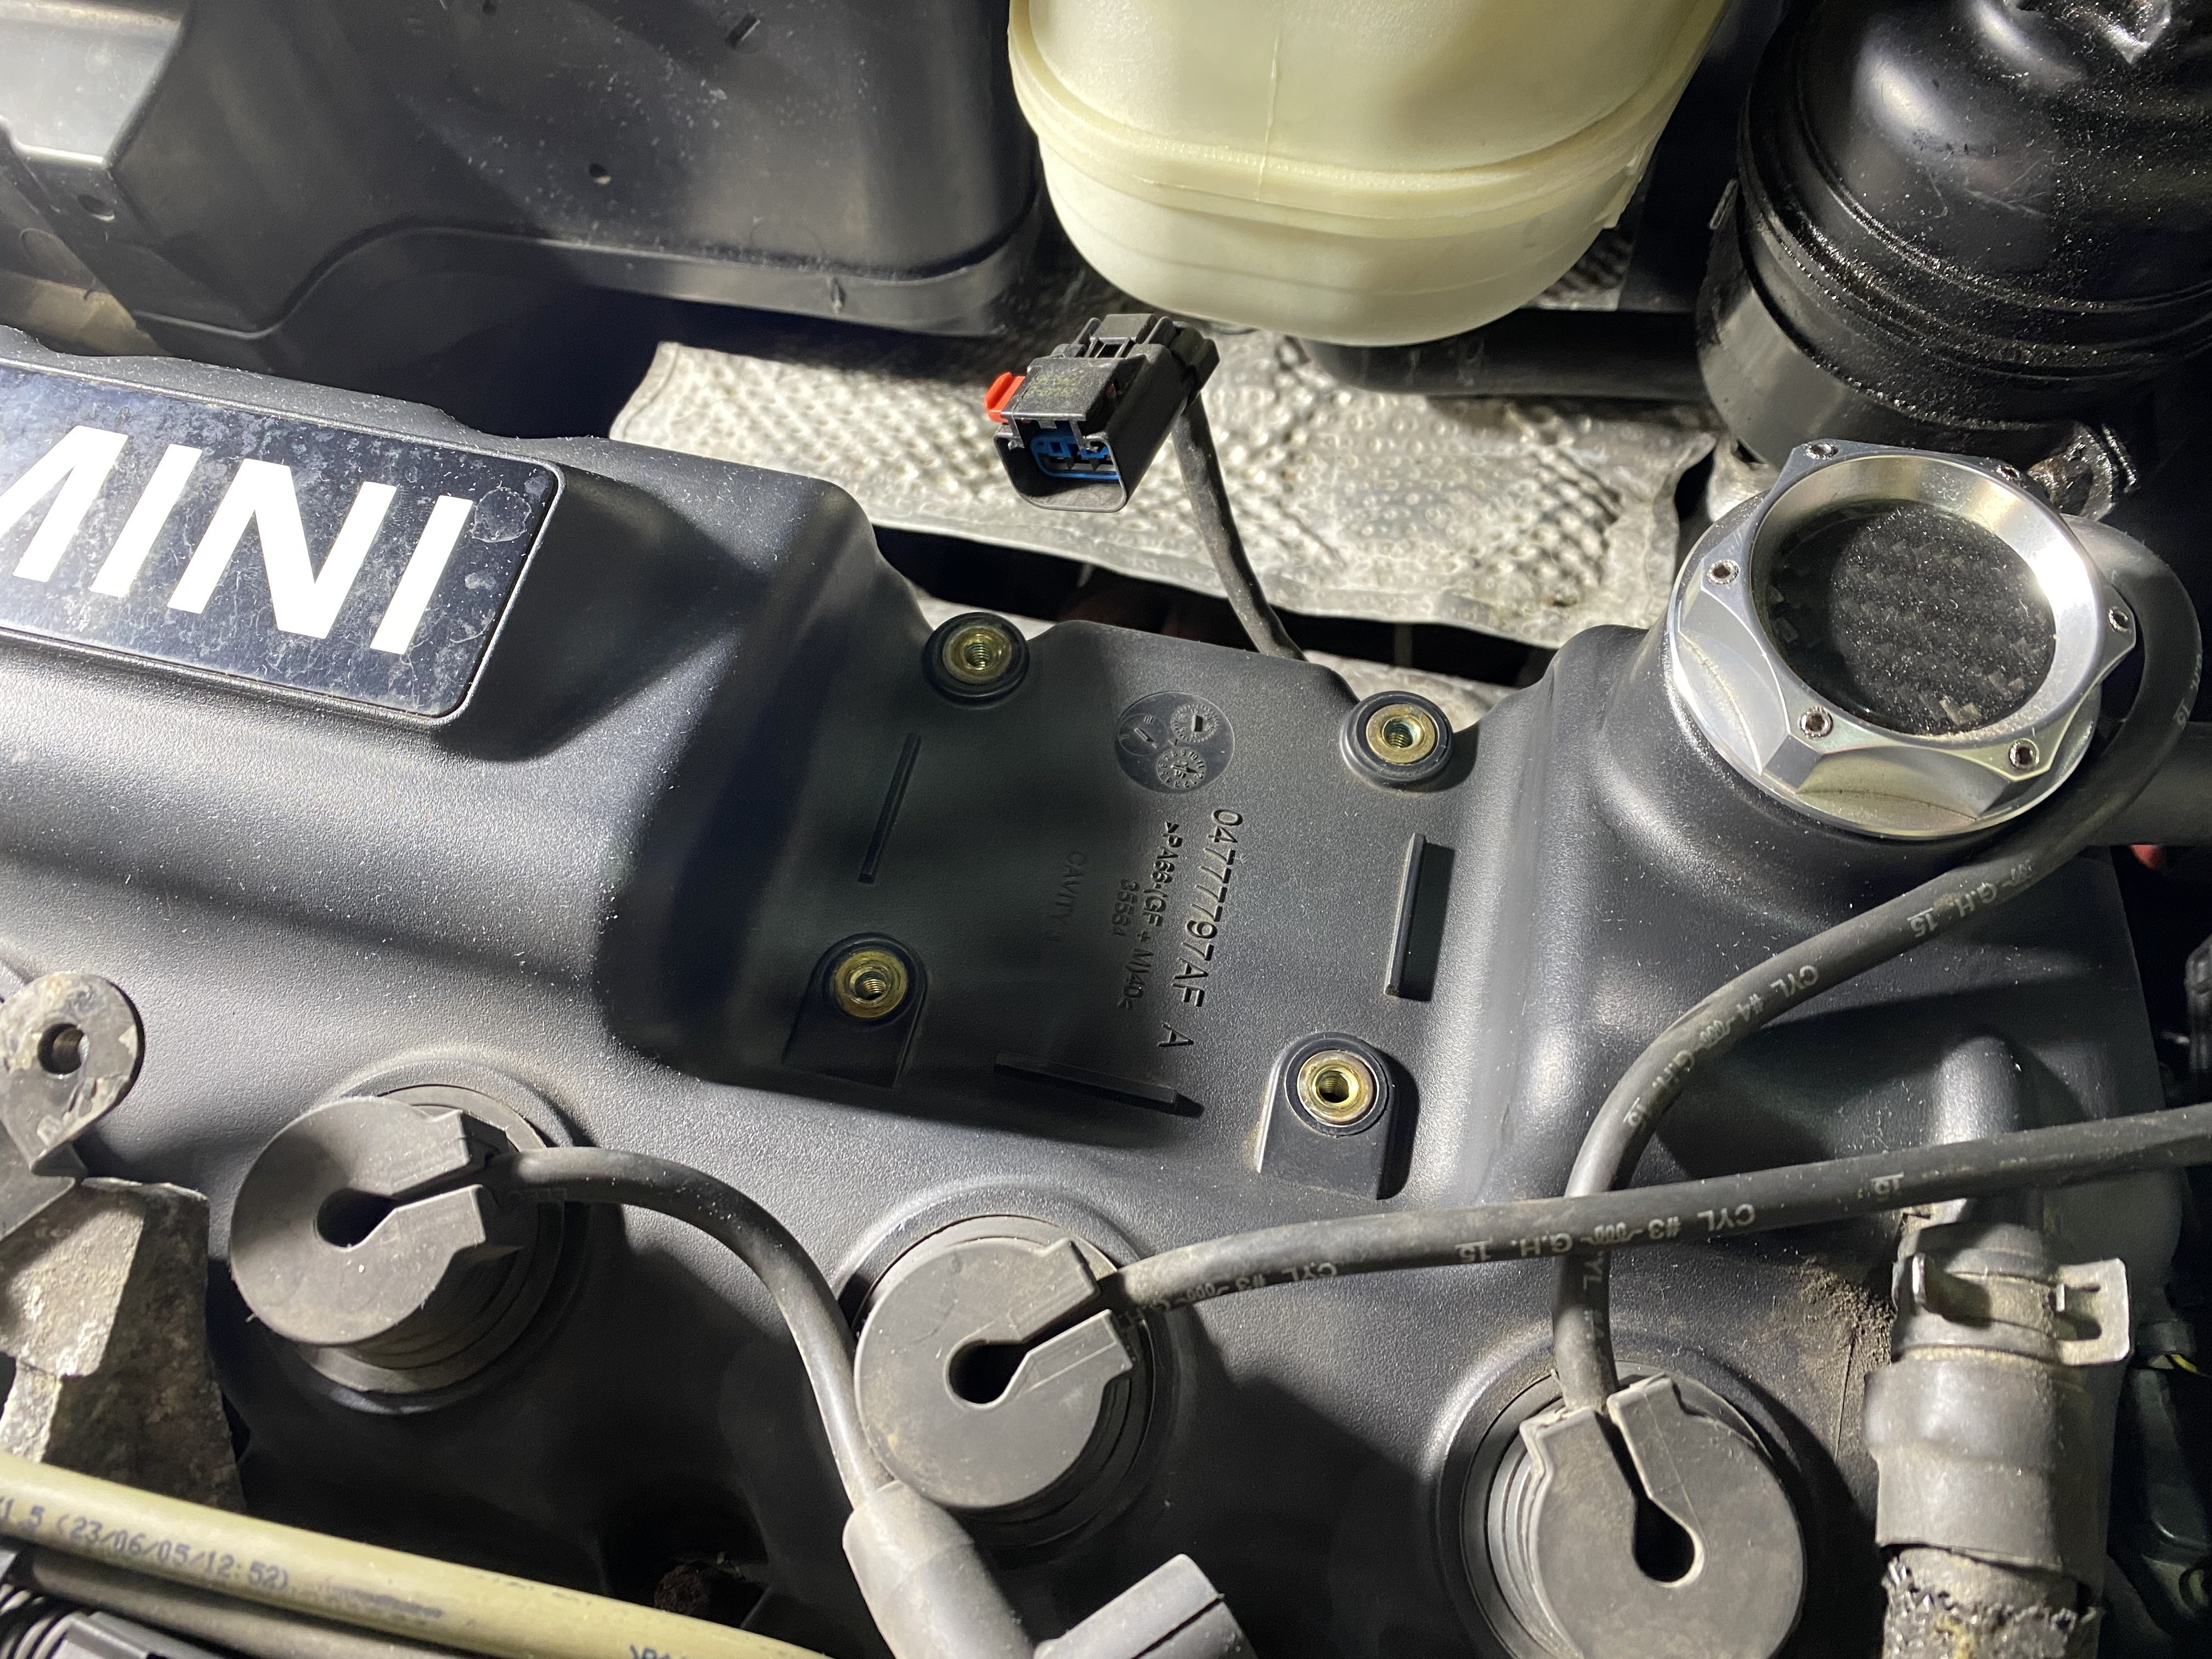
This is a good time to clean up all the surfaces and hardware. Then install the new parts.

New wires are blue!

After getting it all installed, a quick test drive felt good. Don't expect a massive difference, but there did seem to be a little smoother feel and acceleration.
Equipment List:
Way Motor Works Ignition Package - Includes Wires, Plugs & Coil
-
1
-
-
Technically, yesterday, but we're on pandemic time, right?
 I inspected and adjusted my coil-overs. I actually raised the ride height slightly front and back. I reduced the amount of 'rake' in the stance and gave it a little more clearance for the ridiculously high speed bumps around here. NC roads aren't quite as nice as NoVA roads either.
-
1
-
-
Sony is making a HU that puts out 45x4 Watts RMS! When you say 'Bass', do you mean DJ BASS BOY sorta Bass?

-
Cool, Bass is good!
I just replaced my factory speakers. I went with MTX Terminator 6.5 component in front, and MTX Terminator 6x9 in rear. They aren't the most pricey, but make a great upgrade over stock. I had already replaced the head unit about 8 years ago with a Kenwood Excelon unit. My recollection is the factory Boost HU only had 6watts per channel, whereas the Kenwood has 22, the OEM speakers had started sounding like mush, so far, it's sounding great now!
-
I can't believe no one has done anything to their MINI since last summer!
 B.A. got some new parts last weekend, I installed new spark plugs, wires, and ignition coil, and a new bypass valve. Seems to be running better!
-
1
-
-
Oh no! Time for me to go hide again!

-
1
-
 1
1
-
-
It looks like things are on a positive direction, MOTD 2021 may be a go!
-
I may have an incentive to get some work done on B.A. A LOT of work!
-
2
-
-
Just wanted to let you all know I updated my Gallery "Scavenger's Memory Lane", I hope you enjoy the photos!
-
1
-
-
Edge said:You and I are on the same page, brother. Gas, bio intake and bio output, all in the one stop.

CENSORED

-
I have never heard of this being done on the first-gen. Only second-gen.
Check with one of the reputable vendors.
-
The club has done that in the past and we rarely sell them. There are old MOTD Shirts in the club store from past years. Trying to avoid that
I kinda thought so, but I thought I'd just throw it out there anyway
-
We are now only 5 shirts away from making our minimum order!
Ordered at midnight tonight!! I hope you make the target! :top:
P.S. You could order the remainder as spares and most likely sell them at MOTD with no problems.
-
:congrats:
-
This has been a hotly debated topic over the years, so it'll be fun to watch

-
I heard they'll have new Tesla FiatFiatFiatel 3 there also! So excited!


What did you do to your Mini today?
in Maintenance & Modifications
Posted
It is very easy, you don't have to disassemble the door, the light pops in/out from the bottom. reconnect the wire and you're done.